Sunday, December 03, 2006

Apple Gingerbread with Cinnamon Icing


Well, I'm afraid it has been a little while since my last post. Of late it has been difficult to find a weekend with enough time free to research, write, bake and photograph, but I am aware that my opportunities for doing so may decrease further in the near future. Many weekends recently have been taken up with house-selling and house-purchasing activities; or we have been out and about test driving pushchairs or cot viewing. We are expecting our first baby in February, and all spare time seems to be focused on him/her, and relocating to Hertfordshire ahead of the big event (and possibly before Christmas). But today, I am making cake whilst the sun shines, and I have been inspired by the new county that I hope to be living in soon.

Hertfordshire is one of southern England's apple growing counties. The first commerical plantings of Cox's Orange Pippins were established there in the 1860s. The crisp, sweet and sharp, russetted dessert apple became one of the most popular varieties and is widely available today. I had bought a quantity of Cox's and Bramley apples with which to make some mincemeat, and having spent a morning in the kitchen inhaling the fug of warm spices, cider and the rich sweetness of cooked apples, I felt ready to bake a little something for immediate consumption (don't you think that 'fug' is the perfect word for cider related activities?).

My recipe is from the book 'Farmhouse Fare' by Countrywise Books. First published in 1973, it is a collection of country recipes gathered by the readers of 'Farmers Weekly' magazine. The recipes had been collected by the magazine since its launch in 1934; generally from the wives and daughters of farmers - those stalwart ladies at the heart of rural communities, who make good use of locally available ingredients, and produce from their own fields and livestock. My particular recipe was sent in by a Miss Mary MacDonald of Inverness-shire (Scotland), but it struck me as being the perfect recipe to capture something of the combination of apples, sweetness and spice that I had scented the house with whilst simmering my apple mincemeat.


225g cooking apples (or strong flavoured dessert apples, such as Cox's Orange Pippins)
75g Demerara sugar
112g golden syrup
75g butter
175g self-raising flour
1 teaspoon ground ginger
1/4 teaspoon ground cloves
1 egg

For the icing:
175g icing sugar
2-3 dessertspoons of warm water
1 level teaspoon ground cinnamon

1. Preheat the oven to 180C/350F/Gas mark 4.
2. Grease and line an square or oblong cake tin (I used a loaf tin).
3. Peel and slice the apples, and put into a pan with 1 dessertspoon of sugar, and enough water to stop them from burning.
4. Stew gently until tender. Mash up and leave to cool.
5. Put the golden syrup, butter and the remainder of the sugar, into a pan and warm over a low heat until the sugar has dissolved. Leave to cool.
6. Sift the flour and the spices into a large basin.
7. Whisk the egg in a smaller bowl, add the cooled syrup mixture and continue to whisk until well mixed.
8. Add to the flour, along with the apple pulp. Stir well and then turn into prepared tin.
9. Bake for about half an hour.
10. Allow to cool a little before turning out of the tin. When fully cooled, prepare icing.
11. Sieve icing sugar and cinnamon into a bowl.
12. Mix with enough water to form a thick coating consistency.
13. Spread over the top of the cake and leave to set.

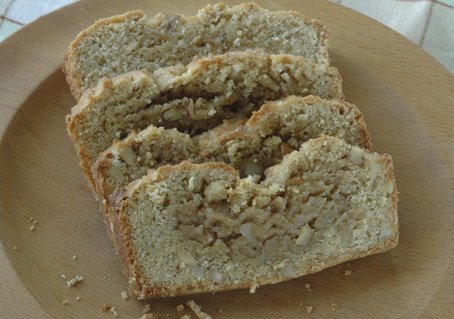
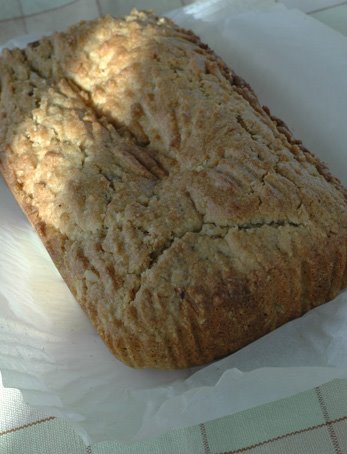
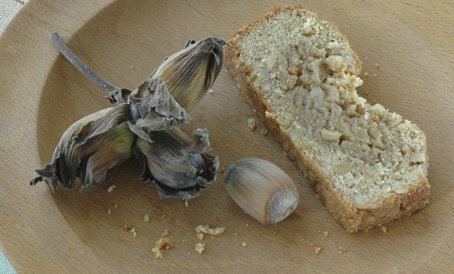
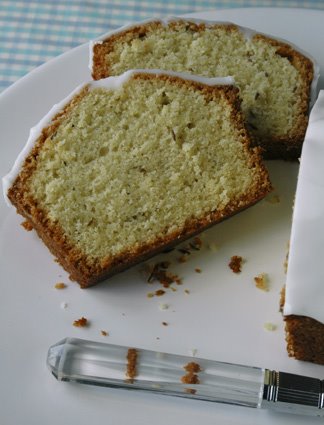
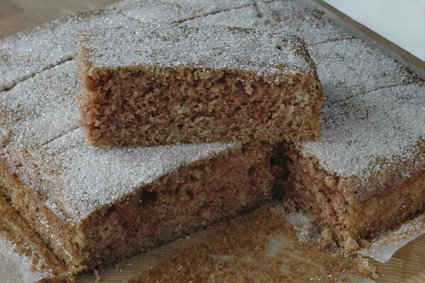
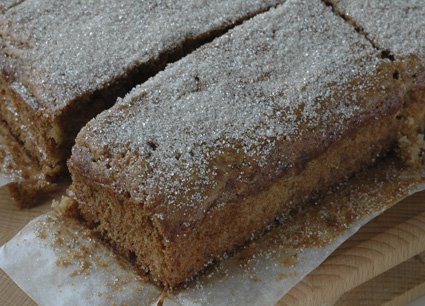
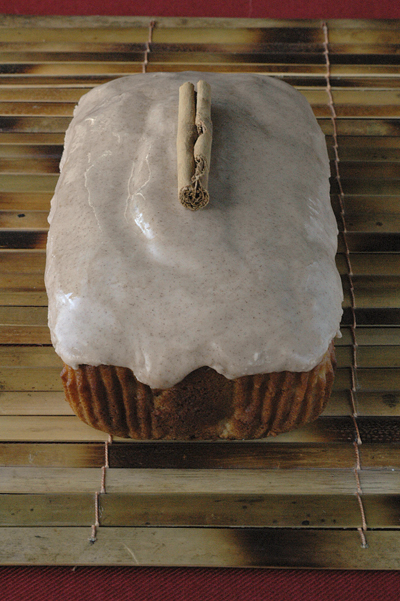
The gingerbread was a pale sponge, rippled with the flesh of the cooked apples. Lovely and moist. I was concerned that the quantity of cinnamon in the icing might be too tongue numbing, but it was perfect. Icing sugar is so saccharine, that the cinnamon had to fight hard to match the sweetness. The spiced icing complemented the cake extremely well, and added an extra flavour to the whole. This could be a nice alternative to the heavy fruit cakes served at Christmas time, perhaps with the addition of a handful of raisins. Plastic Santa is optional.

Tuesday, November 07, 2006

Holywake Bake Cake


Ginger, long a popular flavouring in British cookery, was just one of the smaller things that we have the Romans to thank for first bringing to our shores. As an ingredient imported into the kingdom, for most people it was not an everyday taste. Thus it was a flavour enjoyed at festivals and feasts - fairings were ginger biscuits, and also popular at social occasions were gingerbreads or parkin.

In the bad old days before telly, any excuse for a bit of time off work, or for a pint or two of strong beer, was an opportunity to be seized (so things haven't changed all that much really). Unfortunately, this meant that less cheerful get-togethers, for reasons such as a public hanging or burning, were also a chance for a holiday, a slice of cake and a jug of ale. 'Holywake' is a 17th century word (in use in the Cotswolds) for 'bonfire'; more specifically meaning a bonfire lit to extinguish heretics. Holywake Bake was, according to June Lewis in 'The Cotswold Cook Book', a cake cooked and sold at such unholy gatherings. To my mind, the inclusion of oatmeal in this recipe makes it a Northern treat, as oats grow best in the Borders counties and Scotland. Oatmeal is a key ingredient in parkin (a type of gingerbread cake), which itself has an association with November the 5th. I decided to have a go at baking Holywake Bake Cake because I thought it interesting to find a bonfire story alternative to the well-known tale commemorated with thanksgiving explosions at this time of year. Sorry not to come up with something a little more cheery!

175g self-raising flour
50g fine oatmeal
1 1/2 teaspoons of bicarbonate of soda
1 level tablespoon ground ginger
110g raisins (if liked)
2 tablespoons of golden syrup
2 tablespoons of black treacle
75g unsalted butter
75g brown sugar
1 egg, beaten
(also on June's ingredients list was 1/4 pint of milk, but this was omitted from the method - add a little milk to the mixture if you think it looks dry)

1. Preheat oven to 170C/325F/Gas 3. Grease and line a 10" by 7" tin.
2. In a large bowl stir together the flour, oatmeal, ginger, raisins (I excluded these) and bicarbonate of soda.
3. Put the syrup, treacle, butter and sugar into a small saucepan and melt over a low heat. Stir well to blend.
4. As soon as the above mixture has melted, pour into the dry ingredients and mix.
5. Add the egg and beat well. Add some milk now if you think it necessary - I didn't because I thought the mix looked OK, but the resulting cake could perhaps have benefited from it.
6. Pour into prepared tin and pop in the oven. Cake should take about an hour to bake.
7. Allow to cool in the tin; then turn out and cut into (12ish) squares.


I followed June's suggestion and made this a few days ahead of November the 5th; the cake would grow moist and sticky if it were to be left in a tin for a short time. This is usually sound advice with gingerbreads, but this time round I didn't find that the cake improved any. In fact I was a little disappointed by it. Maybe that errant 1/4 pint of milk would have made all the difference, although I have found plenty of other gingerbread recipes that don't call for any extra moisture. Best consumed with a large mug of something wet and warming.

Sunday, October 22, 2006

Rock Cakes & Biscuits


When poorly advised persons think of British baking, it may well be that monstrously hard rock cakes, rejected by even the dog, are what such folk think of. The epitome of a lack of basic skill and care in the baking department. Rock cakes, admittedly, do have a bad reputation, and their title does make for easy mocking. However, the name is supposed to be for their appearance, NOT their solidity. I think that rock cakes also suffer from being seen as old-fashioned. One can imagine them on the station tearoom counter, under a glass dome, in the film 'Brief Encounter'. But think, this should lend them an air of illicit pleasure, should it not? When I mentioned to friends that I was planning to bake rock cakes, the common response was, "I remember making those at school." Good old domestic science - teaching us the skills for modern life. So why did we not grow up to bake rock cakes on a regular basis? Did we become sidetracked by chocolate brownies, American muffins and cookies? Or was it simply that rock cakes are, whatever the skill of the baker, a second rate cake?

Rock cakes were a ubiquitous feature of school fetes, church teas, railway refreshments etc. They don't have a specific geographic origination, and the OUP 'A-Z of Food' credits Mrs Beeton with the earliest documented recipe for them. Mrs Beeton's orignal 'Household Management' was published in 1861 Her recipe (no. 1747) is for 'Rock Biscuits' rather than cakes. I don't have a copy of 'Household Management' (seem to manage OK under my own rules, thanks), so I used the recipe from this website.

Now, at first glance I was a little horrified at the proportions of sugar to flour, and the large number of eggs involved. I decided to half the recipe. A wise decision it turned out. I had a lovely time whisking the eggs to form a good thick froth, and then adding the sugar gradually, and then the flour. It was at this point I could see an obvious flaw to the recipe - what I had in my bowl was a batter not a dough. It looked far too runny to be able to form into 'rocky' looking biscuits. I added some more flour, but then thought that if I am trying a recipe from the original context, then I should follow it to see how it turns out. So I added a couple of handfuls of currants, and then spooned some mixture onto a baking sheet. Mrs Beeton's instructions state that you should use a fork to make the mixture (she calls it a dough) look as rough as possible. Sorry Isabella, but this just was not possible. Baking sheet number one went into the oven, and I tipped more flour into my bowl (lost track of quantities by this point), and I mixed in enough to bring the mixture together into a more dough-like consistency. By this point I was concerned that I was undoing all my good whisking work, and I decided to spoon out the mixture, roughen surface with a fork, and stick baking sheet number two into the oven.

Neither sets of biscuits looked quite how I imagined that they would.

Baking sheet no. 1


Baking sheet no. 2

Unfortunately, nor were they good to eat. Dry, hard and despite all the sugar and eggs, very bland. Sorry Mrs B., but these biscuits did not rock.

So I turned to a cookbook published in 1948, just three years after 'Brief Encounter' was first screened. I felt confident that by this date, rock cakes had evolved into a more edible proposition.

Orange Rock Cakes (from Elizabeth Craig's 'Economical Cookery')

225g flour
2 teaspoons baking powder
1 egg - beaten well
75g fine sugar
75g butter or margarine
Grated rind and juice of 1 orange
25g candied peel - finely chopped

1. Preheat oven to 180C/350F/Gas 4.
2. Prepare baking sheets.
3. Sift the flour and baking powder into a basin.
4. Rub in the fat.
5. Stir in the sugar, orange rind and juice, candied peel, and beaten egg.
6. Mix to a very stiff dough, then with two forks take pieces the size of a walnut and place a little apart on the baking sheets.
7. Bake for 10-15 minutes until golden.


Success! Not only did the consistency of the dough prior to baking look right, but the finished cakes were golden and had a good cragginess to them. Each cake made a brief encounter with my plate before disappearing. Texturewise they were pretty similar to a scone, and the hint of orange was a nice touch. They were good the day of baking, but not bad a day later. Cakes/buns of this type can always be revived by the spreading of a decent bit of butter. Time for a rock cake renaissance I think.

Sunday, October 08, 2006

Kentish Cobnut Cake


...try saying that with your mouth full.

A cobnut is a type of hazelnut. The Kentish Cob variety, is ,however, not a hazelnut but a filbert - a slightly different species - according to the Oxford Companion to Food and the Oxford A-Z of Food and Drink (see also here. However, the websites of the Kentish Cobnut Association and www.cobnuts.co.uk, both state that Kentish Cobs are hazelnuts. If you know the definite answer please do let me know! Cobs take their name from the Old English 'cop' which meant head or 'cobbe' which meant any round object. The same descriptive word was also used for the cob loaf (a type of bread). Cobnuts were used as a predecessor to conkers in a similiar game called 'coblenut' (bet those 16th century schoolchildren didn't have to worry about Health & Safety leglislation).


A Mr. Lambert first cultivated the Kentish Cob in Kent in 1830, although other varieties of filbert and hazelnut were also planted commerically throughout the county and had been since the late 18th century. In Kent the orchards where the cob/filbert trees are grown are referred to as 'plats'. The harvesting of the nuts was traditionally carried out by itinerant pickers (just as the hops of Kent drew Londoners out to the countryside to earn some extra money); whether this is still the case I don't know, as the cultivation of cobs is carried out on a lesser scale now than in the early 20th century (7,325 acres pre 1914, and only 200-300 acres today). The first picking of the season is carried out in August, when the nuts are still very green and 'wet'. The second picking is about a month later, when the nuts have dried and ripened a little. A final sweep of the plats is done later to harvest anything still left on the trees. Both the green and the ripened nuts can be eaten, and at each stage the nuts can be roasted to enhance their flavour.

How to roast cobnuts (from the website of the Kentish Cobnut Association):

Crack and shell them, then cook them on tinfoil or a baking tray in an oven heated to about 150°C, 300°F, Gas Mark 2, for an hour or so; the cooking time depends on how ripe and how dry they are. First they become soft, but do not remove them until they have hardened, but have not blackened. They can also be cooked in a microwave oven; 4 oz of kernels will typically take 6 minutes on high.


I bought my Kentish cobnuts from Waitrose. I spy them each year, and as far as I know they are the only supermarket to stock them locally. I like the fact that they still have their husks on them. How nice to be able to buy something that hasn't been stripped, sanitised and wrapped in plastic. Duly roasted as per the above instructions, I proceeded with a recipe from 'English Teatime Recipes'.

225g self-raising flour
1 rounded teaspoon of ginger
110g butter (at room temperature)
110g brown sugar
50g Kentish cobnuts, roasted and chopped
1 large egg, beaten

1. Preheat oven to 180C/350F/Gas 4.
2. Grease a baking tin of approx. 9" by 4". I used a loaf tin instead as my shallow (square) tin was too large.
3. Sift flour into a bowl with the ginger.
4. Rub in the butter until the mixture resembles breadcrumbs.
5. Add the sugar and the nut and mix well.
6. Stir in the beaten egg. The mixture will remain fairly dry and crumbly.
7. Put the mixture into the prepared tin and pat down gently with a fork.
8. Bake for 20 - 30 minutes. I took mine out after 20, but after cutting a slice I put it back in the oven for another 15 mintures. This was because the centre of the cake was very moist looking; however, after further cooking it still looked exactly the same so I concluded that this was how it was supposed to be.
9. If using a shallow cake tin, cut the cake into squares.


The cake has a very loose, crumbly texture - unsurprising considering the appearance of the mixure. Indulgent toppings for your slice of cake might be honey or nutella, alternatively a crisp, sharp tasting apple sliced thinly. A proper Kentish drink to accompany your cake would be a draft of cider - should you have any left over from last time's cake-making...


Check out www.cobnuts.co.uk for other recipe ideas - damson and cobnut mincemeat caught my eye. Make now in time for that only-to-be-mentioned-post-1st-of-December event.

Sunday, September 24, 2006

Seed Cake


Just in time for your harvest supper...

Seed cake is a plain sponge flavoured with caraway seeds, and maybe including some mixed peel. The taste for caraway seeds is perhaps out of fashion now (in the UK at least), but they were once a flavouring much used in cakes, breads, buns and biscuits from the 17th century to the mid-20th.


I have also found that 'seed cake' can be used as a more general term for a cake served at festivals to celebrate the spring sowing of wheat, or to celebrate the autumn harvesting of the crop. Laura Mason writing in the 'Oxford Companion to Food', quotes from a book published in 1892: "Fifty years ago seed-time also had its festival, although on a lesser scale, as well as harvest. At the backend, when the early sowing had been completed, the farmer made a sort of feast for the men, the principle feature of which was 'seed-cake', which was given to each of them. The cake did not get its name from anything that it contains, for in was in fact an ordinary sort of currant or plum cake, but from the occasion." Elizabeth David in 'English Bread' suggests that the caraway seeds were symbolic of the wheat grains sown, and that this would also explain the inclusion of such cakes and breads on the Lenten table (I assume she means eaten to celebrate the end of Lent). One sweetened bread product that included caraway seeds was the wigg - these were eaten with ale and cheese at harvest time, but over time also became a richer, grander bun. For more information on harvest traditions, click here.

Harvest festivals and harvest suppers are traditionally held on the Sunday nearest to the Autumn Equinox (when the hours of daylight equal the hours of darkness). This year the Autumn Equinox is the 23rd of September, i.e. yesterday (and the official start of autumn, nights drawing in etc., but let's not think about that aspect of the season).

Although during my research I came across references to seed cake (all of the caraway variety) made in different regions of the country. The recipes varied very little - some cakes had mixed peel or lemon zest in them, others had solely caraway seeds. I think that seed cake had wide popularity and was baked nationwide, so cannot be attributed to any particular corner of the country.

I have baked seed cake previously from a recipe in Waitrose Food Illustrated magazine. This made a cake similar to madeira cake in buttery richness, and I loved the flavour that the seeds gave to what otherwise would be a very plain cake. I decided to try another recipe this time round, and settled on one from Jane Grigson's ' English Food'. The difference with this recipe is that it includes a small amount of ground almonds, which Jane claims makes the cake 'moist and delicious and most exceptional'! Elizabeth David, not a fan of caraway, had been put off seed cake by dry sponges eaten as a child, and I suspect Jane Grigson may have had similar experiences, hence her delight at finding a recipe resulting in a moist cake.

175g butter
175g caster sugar
3 eggs
1 rounded dessertspoon of caraway seeds
1 level tablespoon ground almonds
250g self-raising flour
A little milk on stand-by

1. Preheat oven to 180C/350F/Gas 4. Prepare a loaf tin.
2. In a large bowl cream together the butter and the sugar. When mix is light and fluffy stir in the caraway seeds.
3. Sift the flour into another bowl and stir in the almonds.
4. Separate the eggs. Whisk the egg whites until stiff, but not too dry looking (you're not making meringues here). In another bowl beat together the yolks. Fold the yolks into the whites.
5. Add a little of the egg mix to the creamed butter and sugar, and a little of the flour. Stir in carefully. Continue to do this until all is blended. If the resulting mixture looks a little dry, add a little milk (I put in about 3 tablepsoons worth).
6. Put cake mixture into the prepared tin, and level the top with the back of a spoon.
7. Bake for about an hour and 5 minutes.
8. Allow cake to cool in tin for 20 minutes before turning out on to cooling rack.


Following a suggestion of my husband's (well, you have to once in a while) I iced the cake with glace icing, but I couldn't help but slip in a little lemon juice so that it had a good citrus kick. I had wanted to use some lemon zest in the cake, so figured that lemon in the icing was a good second option. Actually I felt the that lemon flavour was perhaps too strong ( I used a whole lemon), but it made a good contrast to the flavour of the sponge. The sponge was nice and moist, but I am not sure that the small quantity of ground almonds would make that much difference. The recipe that I have used before didn't contain almonds, and this cake turned out equally well.

A slice of seed cake is good with a glass of madeira, or, equally, a good old-fashioned cup of tea. Here's to autumn - flaming leaves; conkers; hot chocolate on a cold evening; home-made soup for lunch and toad-in-the-hole for tea!

Wednesday, September 06, 2006

Herefordshire Cider Cake


We apparently have the Norman Conquest of 1066 to thank for cider; although maybe it is now a bit late for a 'merci'? The Normans brought their cider making knowledge to the Monasteries and orchards of England. The climate of southern England meant ideal growing conditions for the fruit trees (a replacement for the wine grape vines planted centuries earlier by the Romans). Cider was produced in most of the southern counties, although nowadays it is mainly Kent (in the east) and Somerset and Hereford (in the west) that have kept the tradition. Cider is akin to wine in that the soil, climate and variety of apple used have a bearing on the resulting flavour, and this can vary from harvest to harvest. The main general difference between the ciders of eastern England and the ciders of western England, is that in the east cider-makers tended to use whatever apples were available locally (Bramleys especially), whereas in western England apple varieties were cultivated specifically for cider production.

Cider has seen a rise and fall in popularity over the centuries. With the interest in small-scale production, organic products and traditional foods/drinks, there is currently an upsurge in the drinking of cider and it is fairly easy to purchase a good range of English ciders. During the 18th century cider was looked down upon as a drink of the labouring classes. The gentry didn't want to be supping from the same cup as the country yokel, and they began to drink more of imported wines. It took until the end of the 19th century for an interest in reviving cider production to kickstart the industry in England. Companies such as Bulmers of Hereford, still trading now, were established during this period.

For a more detailed history of cider please click on to this link.

Cider cake was baked as part of the annual cider festival held in Herefordshire, but other cider producing counties also made a version of the cake. All the recipes use baking soda, so the cake must have a fairly recent history (second half of the 19th century). The acidic cider works with the bicarbonate of soda to help the sponge to rise.

I used a genuine Hereford cider, Dunkertons Premium Organic. A medium sweet sparkling cider, made from a blend of apple varieties. Read these names and feel your mouth water. Sheeps Nose, Brown Snout, Foxwhelp Black, Improved Kingston Black and Balls Bitter Sweet. Imagine all that fruitiness condensed into a bottle, and that's the beauty of the drink. With such fizzing flavour I had high hopes for the taste it would bestow on my cake.

My recipe came from the Reader's Digest 'Farmhouse Cookery' recipe book, although I found other recipes that were practically identical save for the quantity of cider used. Reader's Digest used the most, and I thought this would bode well for a nice moist cake.

125g butter, diced
125g sugar
2 eggs, beaten
225g self-raising flour
1 teaspoon bicarbonate of soda
Half teaspoon of grated nutmeg or ground cinnamon (I used half teaspoon of ginger and half of cinnamon, because I like both these spices with apple)
200ml cider
Caster sugar for sprinkling.

1. Preheat oven to 180C/350F/Gas 4.
2. Grease a square, shallow cake tin. Mine was 21cm by 21cm.
3. In a large bowl, cream together the butter and the sugar until light and fluffy.
4. Into another bowl sift the flour, the bicarbonate of soda and the spices.
5. Fold half of the flour mixture into the creamed butter.
6. Add the cider and mix thoroughly.
7. Stir in the remaining flour, and as soon as mixed turn into prepared tin.
8. Bake for about 35-40 minutes.
9. Allow to cool in tin, and sprinkle with caster sugar once turned out.

Pre-sugar sprinkling.


When I divided the cake up I was surprised to see that the inside sponge had a speckled and rosy hue (as if it had had one too many). I think that this may be down to the chemical reaction between baking soda and cider - my food science knowledge is very limited. I liked the effect - rather like the skin of a flecked apple.


The cake was both moist and very light, and the cider flavour was quite distinctive. I mixed some cinnamon powder with my sugar prior to dusting the cake, and I enjoyed the extra kick of spice and sweetness. I have previously made cakes with fresh apple, which I like because of the change of texture that the fruit lends, and also the concentrated sweetness of the pulp. I think a hybrid cake with both cider and apples would also be a fine autumn treat. Get scrumping now...

As a cyclist I have to give a plug for the Hereford Cider Route - navigable by bike (and car if you must) - read more here

Monday, August 28, 2006

Cornish Saffron Cake


Saffron is an ingredient imbued with an air of exoticism, sensuality and beauty. Its musty perfume and concentrated potency both awaken the senses and astonish - how can such a tiny amount of what looks so meaningless release such colour and scent? The labour intensity of harvesting saffron (each stigma removed by hand, 4,300 flowers to be visited to form an ounce of weight), and thereby the cost of the end product, have also added to its status. Stories of Phoenician sailors landing on the rugged Cornish coast to barter with saffron in exchange for tin, have increased its romantic image.

That all said, saffron is a spice not to everyone's taste. For all those that wax lyrical over it, there are also those that consider it a tad overrated. Of course those less impressed may not have sampled the true flavour of saffron. Because of its cost synthetic substitutes or ground turmeric powder are sometimes used in its stead. In the index of Elizabeth David's 'English Bread and Yeast Cookery' is the item 'Saffron, travesties of'. Turn to the page in question and you will be warned to beware 'false, shameful saffron cakes'; these will be made without saffron, only colouring, too much vanilla and sugar sweetening and are sponge cakes, rather than yeasted breads.' Ms. David goes on to give several recipes for genuine saffron cakes - a recipe originating from Devon; a traditional cake from Cornwall; and also recipes from the 17th and 18th centuries which were baked more widely across the country. Not a hint of an E-number or a whiff of shame to be found in these recipes.

Saffron was originally favoured for the lovely bright yellow colour that it imparted to food. It was used liberally by chefs to wealthy mediaeval households for just this effect. Saffron was imported, but some areas of England were able to cultivate it. The cost of 'local' saffron was little less than imported saffron because of the labour involved in producing it. Cambridgeshire and Essex had saffron farms (so too Stratton in Cornwall according to Linda Collister in 'The Bread Book' and Jane Grigson in "English Food' - although I could find no further information on Cornish grown saffron). Saffron Walden in Essex is named for the local trade, although the saffron grown here was principally used for dyeing wool for weaving. The cultivation of saffron in England had all but died out by the 18th century. Despite its growth on the East side of the country it was only in Devon and Cornwall that saffron became associated with a regional food, and both districts developed their own form of fruit bread flavoured with the spice.

Now, at this stage I have to confess that part of the reason that it has been such a long while since I last posted, is that I had
to have two goes at turning out a decent saffron cake. Try number one used the Cornish Saffron Cake recipe from David's 'English Bread etc.', and frankly my loaf turned out to have all the appeal of a house brick. It was edible, but very disappointing. The rise I achieved with the dough was really minimal, despite my incredible patience with it. Patience sorely tried my loaf (after a taste) went binwards. The saffron I used was clearly past its prime, and the loaf was a muted yellow, rather than a proper sun-has-got-his-hat-on golden. I blame myself for the outcome, but, what to do? Browsing through a recipe book at work I found the answer. In Linda Collister's 'Country Breads' book is a recipe entitled 'Daniel's Cornish saffron bread'. I turned to the page expecting to find that Daniel is a Cornish master baker of many years standing. Nope. Daniel is Linda's six year old son, and he bakes a saffron cake each Sunday for tea. Now was the time to swallow my pride (and hopefully a tastier slice of cake), and admit that if a six year old could successfully turn out a saffron cake using this recipe, then there was HOPE FOR ME YET!

I bought myself some fresh saffron, and failing again to find fresh yeast, bought myself a new tin of dried yeast. Unfortunately my mum wasn't around to weigh out my ingredients, nor to negotiate the hot oven, but I thought I might manage this for myself.

Cornish Saffron Bread (so easy even a 33 year old grown-up can make it)

Half a teaspoon of saffron strands
300ml hot milk
500g unbleached white bread flour
1 teaspoon fine sea salt
150g unsalted butter, diced
50g light muscovado sugar
15g fresh yeast/7g dried yeast
100g mixed fruit

Makes one medium sized loaf

1. Pop the saffron into the hot milk and give it a stir. You will start to see the colour leach from the strands. Glorious. Leave to infuse overnight.


2. Grease a suitable sized loaf tin.
3. Put the flour and the salt into a large mixing bowl. Add the butter, and rub in with fingertips until you get the appearance of fine breadcrumbs. Stir in the sugar until well combined.
4. Reheat the milk to just below blood temperature. With the dried yeast I used I had to use this liquid to get the granules active, and the same applies to fresh yeast. Some dried yeast you can add directly to the flour, so check on the packaging.
5. Make a well in the middle of your flour and pour in the milk and yeast mixture (unless you have added the yeast to the flour - see above).
6. Fun bit. Using your hand work the liquid into the flour to form a dough, and then turn out onto a work surface and knead for 10 minutes. A great early morning workout.
7. Add the dried fruit to the dough (best done in stages) and knead for another minute until well combined.
8. Pop the dough into the greased tin. Put the tin into a large plastic bag (make good use of a nasty supermarket carrier) allowing space for rising, and tuck the opening of the bag under the tin to seal it. Leave the dough to rise to the top of the tin - this will take 1 - 3 hours depending on the kitchen temperature. My dough was ready to bake in 2 hours.


9. Preheat oven to 180C/350F/Gas 4. Bake your loaf for about an hour. The top will be a golden-brown, and the base of the loaf should sound hollow when tapped. Leave to cool on a wire rack.


And I am pleased to say that this go at saffron cake making had a happy ending. The dough swelled beautifully, the loaf was a beautiful shade of sunshine, and the crumb was soft and succulent (like a brioche). The saffron flavouring (and scent) was unhindered by the addition of other spices. So, thank you Daniel. You are my new baking mentor.

Monday, July 31, 2006

Scones, Cream and Jam - a West Country cream tea


The important question of the day is - do you put cream on first and then jam on top; or do you smother your freshly baked scone with zesty fruit preserve and then top with lashings and lashings of thick, thick cream? If you like cream on top then this means that you follow the Cornish method of anointing your scone; and if you put jam uppermost then you are Devonian in your tastes. The folk of Devon and Cornwall both believe their way of dressing scones is correct and best. I feel a taste test coming on.

Scones in the Devonian manner - cream then jam.

Cornish scones - jam then cream.

Scones - a fundamental part of a West Country cream tea. Cream teas - a fundamental part of English fine food and culinary culture. Who can imagine a finer way to spend a lazy afternoon in the English countryside, than with a jam spoon in one hand, and a smooch of cream on your lips...

I have previously looked at the history of the scone, and found it to be of Scottish origin. Traditionally cooked upon a gridle or griddle over a open fire. When enclosed ovens and chemical raising agents were introduced in the 19th century, a new generation of scones was born. The Scots baked these new aerated scones and served them as part of their afternoon and high teas. However, other parts of Britain were not slow to also get baking these new-style scones, and in the West of England they were consumed with local products such as clotted cream and fruit preserves. In Cornwall black treacle is also a favoured topping - served along with clotted cream the combination is known as 'Thunder and Lightning'.

Thunder and Lightning - cream with black treacle.

Scones are a favourite food of mine, but I confess it is a good few years since I have made a batch. I can see that good scone baking is a skill that may come with practice, but every scone-mistress or master has had to start somewhere. To give myself an advantage I am following a recipe from Linda Collister's 'The Baking Book'. In the introduction to her scone recipe she writes, '...over the last 20 years I've tried every recipe I've come across [Now, that's dedication] - ones using soured milk or buttermilk; risen with various combinations of bicarbonate of soda and cream of tartar, or baking powder; made with cream, or with golden syrup, with or without eggs.' Twenty years of practice must result in a damn fine recipe? Linda uses self-raising flour (so as to avoid a chemical aftertaste), a pinch of salt, golden caster sugar, butter, an egg and a little milk. Her recipe suggests that you make the dough up in a food processor as this brings the dough together quickly, with the miminum of handling.

230g self-raising flour
a pinch of salt
40g golden caster sugar
40g unsalted butter, diced
1 egg, made up to 140ml with milk

Makes 8 scones when using a 6cm fluted cutter
(might appear to be a modest quantity, but when split and topped with cream and jam this will seem like a feast)

1. Preheat oven to 220C/425F/gas 7.
2. Sift flour and salt into a bowl, then tip into food processor.
3. Add the sugar to the food processor and blend briefly to mix the sugar into the flour.
4. Add the diced butter and pulse until the mixture is lump-free and has the look of sand.
5. Mix the egg and milk together, and then pour into the food processor whilst it is running. You need to keep an eye on the mixture, for as soon as it comes together into a soft ball of dough you need to stop the machine. If dough looks too dry add a little more milk.
6. Remove dough and turn onto floured surface. If the dough is sticky work in a little flour (gently does it). Otherwise, knead the dough carefully - just enough to bring it together into a neater ball, and then pat out on your work surface (use your hands). You need to only press the dough to a depth of about 2cm. Use your cutter to cut out circles of dough. Use the trimmings left to form a second ball of dough, pat out again and then cut more circles.
7. Arrange the circles of dough on a prepared baking tray and pop straight into the oven. Keep an eye on them. The scones should take 12-15 minutes, or should be extracted when they have gone golden brown on top. Put onto wire cooling rack as soon as they leave the oven. Cover with clean tea towel to help keep moistness in.

Scones baked and cooled, I headed out to the garden to conduct some scone sampling.
I present the naked scone...


The scones were very light, almost of melt in the mouth crumbliness. This did prove to be a perfect backdrop to the more substantial weight of the cream, and to the more assertive flavour of the jam. I don't think that they were THE ultimate scones, but they were very good (they could have been a little moister I think). As to whether the Devonian or Cornish order of topping was the best, I will have to sit on the fence and say they both work very nicely. However, the black treacle and cream was not for me. You would have to be a real fan of the flavour of treacle to like this as it has such a strong taste.

Which would you choose?...

Gratuitous clotted cream image - one million calories a look.

Sunday, July 09, 2006

A Meme of Fives...

Brazilian Linda kindly nominated me to take part in the latest circulating Meme.

Here goes:

Five Things in my Freezer

We only have a small icebox at the top of our fridge, but it is amazing how much you can cram into it. Amongst those items lurking/imbedded in the ice are:

1. Blackberries picked last summer from along the banks of the Thames.
2. Unmarked containers of homemade soups.
3. Edamame.
4. Bits of chicken useful for soup making.
5. Chopped up brown banana - perfect for putting into cakes.

Five Things in my Closet

1. More shoes than I can wear in my lifetime. Necessary all the same.
2. A portfolio containing the art work I did at University.
3. More scarves than I can wear in my lifetime. These can make great photographic backgrounds, and therefore are also very necessary.
4. My wedding dress, carefully folded into a storage box.
5. Spare duvets etc. crammed into black bin bags.

Five Things in my Car

We don't own a car, and I get to work each day by bicycle. A peak in the panniers reveals:

1. Sun glasses. Crucial to forget these on sunny days, and find it turn grey and wet on days when I am wearing them.
2. Spare carrier bags for wrapping things in when it rains.
3. Bungee clip for attaching objects to my bike. Generally this doesn't work, but I have brought flowers home using it.
4. Puncture repair kit.
5. And on my return home from work each day, my panniers are packed to the rafters with food for the evening meal. Wine bottles at the bottom and squashable fruit at the top.

Five Things in my Purse

1. Money-off vouchers way past their expiry date.
2. A photo of my husband (to frighten off any would-be purse thief?)
3. Business cards for my blog.
4. Lots of plastic - in the form of store loyalty cards, library membership etc., rather than access to fabulous amounts of credit.
5. Many, many old reciepts.

I would like to follow on and tag the following bloggers - the first four ladies I came into contact with through the Euro-Blogging by Mail events, and Pille I met in person at the last UK food bloggers get together. I love the fact that all these sites and individuals represent different countries or different cultures. Plus, you 'meet' the nicest people blogging...

Check out their sites:

Eva at The Golden Shrimp
Fanny at Food Beam
Nicky at Delicious Days
Dagmar at A Cat in the Kitchen
Pille at Nami-Nami

Friday, June 30, 2006

Bakewell Pudding/Tart, Derbyshire


Andrew at SpittoonExtra recently posted a rallying cry to all bloggers to go out a bake a Bakewell Pudding/Tart. This in reponse to a recent article in The Grocer magazine and The Independent newspaper that suggests that the dish is falling out of favour. Mr. Kipling's exceedingly sweet and sickly rendition of the same item has seen a 31 per cent decrease in sales over the last year, that would be nice to put down to keen bakers making their own at home, but apparently the drop in popularity reflects the unhealthy ingredients and the fact we are all so damn health conscious. Hmmm. The presence of sugar, butter and eggs doesn't seem to effect the popularity of cakes generally, so I am not sure about this argument. Perhaps the Bakewell Pudding/Tart is seen as a old-fashioned food, and is simply passing out of fashion. Either way, it would be a great shame for a famed regional dish to simply fade away (I will weep no tear for Mr. Kipling however), and therefore I am firmly behind Andrew's suggestion that as many people as possible make and post a Bakewell Pudding/Tart before the end of the month.

But before I weary my fingers and your patience, I should briefly touch on the duality of the name. It is a tart or is it a pudding? The original dish was known as a Bakewell Pudding. The earliest recorded recipe, by Eliza Acton in 1845, indicates a pastry-less sweet; a dish lined with fruit preserves and topped with egg yolks beaten with sugar and butter, into which a small amount of almond flavouring was added (no ground almonds). As for the stories that attribute the origination of the dish to a clumsy cook at a Derbyshire Inn, who muddled up the making of a strawberry tart by putting the fruit mix straight onto the pastry base of a tart, rather than on the top of the butter, egg and sugar 'filling', I am pretty sure that there is no hard proof that this is the fact. Similar dishes to Bakewell Pudding were in existence for several centuries before Ms. Acton penned her recipe, many were variations on the Transparent Pudding. The Transparent Pudding recipes I could find on the internet all come from late 19th century American cookbooks, so the idea obviously travelled across the Atlantic via a pastry loving cook. Somewhere in Kentucky is a bakery that still makes them for sale. Maybe they are much more widely available than this? - do let me know.

Over the course of the nineteenth century, the Bakewell Pudding came to have a pastry base. Mrs Beeton in 1861 gives a recipe for one with a puff-pastry base. I can see that from then on the Bakewell Pudding could be legitimately be referred to as a tart, for it was baked within a pastry case. Recipes nowadays use either puff or shortcrust pastry, and the title is either for a Pudding or a Tart. In this instance I really don't think it matters too much. The orignal pudding has become a tart, so to my mind either name is valid.

At least two Bakewell-based bakers boast that they recreate the 'original' pudding/tart recipe, and even they can't agree on which name to go by. In Bakewell town there is both a Bakewell Pudding Shop, and aBakewell Tart Shop. If you go to the website of the Bakewell Pudding Shop, you can enter a competition to win one of their renditions of the pudding. Go on, it's worth a shot.

My recipe comes from one of my regular sources, Jane Grigson's 'English Food'. Her recipe is for a Bakewell Pudding, and she mentions that local to Bakewell it is always a pudding and never a tart. Her instructions are for one large pudding, but as I wanted to bake small puddings I have tweaked them a little.

Rich sweet shortcrust pastry (I made enough to line a 12 hole tart tin)
Raspberry/strawberry jam (decent stuff please - I bought raspberry jam but then couldn't get the blooming lid off it, so used strawberry instead)
65g unsalted butter
2 eggs
65g caster sugar
65g ground almonds

1. Preheat oven to 180C/350F/gas 4.
2. Roll out the pastry, press out circles of suitable size and use to line your tin.
3. Melt the butter and leave to cool.
4. Pop a little jam into the base of each pudding. Don't go mad, but put in enough to cover the base comfortably.
5. Beat the eggs and sugar until they are pale in colour and of a good thick cream consistency.
6. Add the butter and stir in, then fold in the almonds. Spoon mixture onto the jam layer - again don't go too mad or you'll end up with a big Bakewell mess when they cook.
7. My little tarts took approx. 15-20 minutes to cook. I whipped them out as soon as they reached a good colour.


I was rather pleased with my little puddings. They were extremely light and easy to consume. The egg, sugar and almond topping formed quite a thin layer, and I didn't really notice a strong almond flavour. I think that the ground almonds served to bind the mixture as much as anything. I would certainly make these again, and I will have to now that they are all polished off. Thanks Andrew, for your inspiring idea.

P.S. For any keen and inventive icecream makers out there, you may be interested to know that I came across a site for the Bakewell Ice Cream Parlour (opening summer of 2006), which will be selling Bakewell Pudding icecream. A good idea?...

Sunday, June 18, 2006

Girdle Scones (Scones Part 2)


So, back to Scotland and my quest to bake the evolutionary forefathers of what we now know as the scone. For my previous posting I baked an oatmeal bannock - bannocks being the great-grandaddy of the scone. To recap: a bannock was originally a loaf of unleavened bread, circular in shape, and baked on the girdle. The name is now applied to all manner of girdle-baked doughs (sweetened, unsweetened, leavened or unleavened), and can refer to a large plate-sized scone. The original of the oatmeal bannock recipe that I used would have produced an unleavened bread. The 'modern' version of the recipe included bicarbonate of soda, although I found that the lift this gave the dough was very limited. Elizabeth David in 'English Bread and Yeast Cookery', comments that the chemical raising agents available to the home-baker from the second half of the 19th century, were first used to introduce some lightness into 'biscuits, girdle scones, oatcakes, and other bakestone products that had previously been made without an aerating agent'. The bannock I cooked was akin to a large doughy oatcake, with a pretty stodgy consistency; and so I wanted to find a recipe that would step closer to producing the type of light scone that goes down so nicely with toppings of cream and jam (particularly in the south-west of England).

I returned to F. Marian McNeill's book 'The Scots Kitchen', and selected a recipe entitled 'White Girdle Scones, or Soda Scones'. The 'white' refers to the fact that these scones are made with wheat flour, rather than oatmeal or barleymeal (these along with rye are Scotland's traditional grains); the secondary title reveals that the scones are leavened in the same way as soda bread is - with baking soda and cream of tartar. They are, naturally, cooked on a metal hot-plate, rather than oven-baked.

450g plain flour
1 tsp bicarbonate of soda
1 tsp cream of tartar
1/2 tsp salt
Buttermilk to mix to a dough (I used up a 284ml carton, and had to top up with milk)

1. Preheat your girdle (no need to grease).
2. Sieve flour, bicarbonate of soda, cream of tartar and salt into a bowl.
3. Add the buttermilk and gently mix in to form a very soft dough.
4. Divide dough into four. Take each piece and shape into a circle and then press gently with your hand to flatten to approx. 1/2inch depth (I started off with a rolling pin, but found it easier to work without it). Cut each circle into four quarters.


5. Pop each quarter onto the girdle. Leave to cook until the dough has swollen and risen slightly, and the base of the scone is light brown (about five minutes). Flip and cook other side. The insides should be cooked when the edges of the scone are dry (if your girdle is too hot the outsides will scorch and the inside will remind doughy - this MAY have happened to one or two of mine, but I will never admit it).


Although some of my quartered scones looked a little abstract post-girdling (if that isn't a verb, then it damn well should be), I was pleased with the general appearance of them. I was careful to not overwork the dough by handling it too much or too roughly, and the last scones on the girdle looked as well as those that hit the plate first. Hopefully this bodes well for my next round of scone baking...

What to top my girdle scones with for sampling purposes? Well, I happened to have a jar of Norwegian blueberry jam, given to me by a friend whose sister lives there. Blueberries are the cultivated form of the bilberry or blaeberry that grows wild in Scotland and the north of England. McNeil gives a recipe for blaeberry jam. It seemed an appropriate choice therefore for my scone topping (along with a lick of butter). The scones had a moist bread-like consistency, with a neutral flavour that made them an excellent back-drop to butter and jam (or even butter alone). I also found that they made a reasonable bread roll substitute to accompany our lunch-time soup. A scone for all purposes, and wrapped in a tea-towel they stayed moist all day, eating well even when cold.

This recipe pushed closer to producing the type scone served in such quantity in Devon, Cornwall, Dorset and Somerset, although the method and ingredients are sufficiently different to ensure that these girdle scones have quite different character. The similarity between these girdle scones and the West Country scones is that they cook to a light, moist dough/crumb. Those 19th century chemists can, I think, take some thanks for their role in the development of the old style unleavened bannock into such good things as these.

My next scone journey will see me descend from the hob to the oven. I am stock-piling clotted cream in anticipation.


I would like to sign off this post by saying hello to all the bloggers (and a couple of partners) that I met yesterday at Johanna and Jeanne's blog party (a joint second birthday). It was great to meet everyone, and I look forward to checking out those sites that are new to me. For those not in attendance, we ate magnificently (inventive canapes, climaxing with a chocolate fountain), and drunk copious amounts of sparkling wine. I didn't take my camera because I knew that the event would be well documented (a gathering of bloggers - how could it not be so!). The weather and setting were fantastic, and Johanna and Jeanne were the perfect hostesses - helped by Carolyn, Johanna's daughter. Thank you ladies!

Friday, June 09, 2006

Oatmeal Bannock (Scones Part 1)


During the course of researching the background to Scotch pancakes, I was surprised to learn that scones are of Scottish invention. I had always assumed that they originated in the South-West of England, hence the popularity of Cornish and Devonshire cream teas, where freshly baked scones are served with lashings of locally produced clotted cream and home-made jams. I was wrong.

In Scotland the girdle has been an essential piece of cooking equipment right through to the late 20th century at least. When English supermarket chains extended into Scotland, they were forced to install girdles in-store so as to be able to provide the Scots with familiar and favoured products (Mason & Brown). This reliance on the girdle, particularly in rural areas, meant that very particular types of food developed north of the border. Breads, for example, were baked on the girdle rather than baked in the oven; the girdle also produced pancakes, oatcakes, thin crumpets, potato and oatmeal scones. The girdle-cooked breads were unleavened, circular in form, and the size of a dinner plate. These loaves were made from barley flour or oatmeal, and were known as bannocks. Over time bannocks began to be made with wheat flour, yeast and were enriched with butter and dried fruit - i.e. the Selkirk Bannock. In present times the name bannock is applied more generally to any baked item of a similar size and shape to the original bannock loaf, and can also be used as a term for a large circular scone which is scored into sections.

So, a bannock can also be a scone. What is a scone? Well, a scone is made from baked dough and a food of many guises - the dough can be sweetened or left plain; the baking can be done on the girdle, or in the oven; the dough can be leavened or chemically raised, or left alone; may be made from various flour types, or have potatoes as a base; oven-baked scones tend to be made of rolled dough, cut into smaller pieces (round or square), whereas girdle-caked scones tend to be left as a large disc. Recipes for scones therefore are very various!

I want to return to oven-baked scones in a future post (and will journey southwards to do so). For this posting I want to girdle-cook an early crossover between what was eaten in Scotland as a bread, and what became more familiar as a scone. For my recipe I used F. Marian McNeil's book 'The Scots Kitchen'. Her recipes for girdle-baked scones, bannocks and pancakes are highly praised in Elizabeth David's 'English Bread and Yeast Cookery'. David advises the baker to make use of McNeil's recipes; she says, 'Her oatcakes and scones have nothing of the tea shop and the tourist board about them. They are the real thing'. Well, Mrs D.'s is a voice to be listened to, so off to the bookshelf I went. McNeill's book is seen as the seminal work on traditional Scottish foods. It was compiled in the 1920s, and is clearly written by an experienced cook. Exact quantities are not always given, and cooking instructions are not of Delia et. al. clarity. McNeill clearly writes for the practised cook, and the baker who has a good feel for the materials she or he is working with. Intimidated, moi?

Scotland had as its staple cereal crops, barley firstly, and then oats. Wheat was difficult to grow and so wheat flour was historically used much less frequently that barleymeal or oatmeal (meal is a less finely ground product than flour). Obviously today wheat flour is widely available in Scotland, but it is still an imported product, and to get a more authentic flavour to your Scottish baking one should really use barley or oats. As barleymeal is hard to come by, I bought some fine oatmeal and used this in McNeil's recipe for Bere or Barley Bannocks, replacing the beremeal/barley with the oat equivalent. She gives two methods, one 'old' and one 'modern'. The old method has no rising agent, uses butter and sweet milk rather than buttermilk. The modern method has no fat added, uses bicarbonate of soda and buttermilk. It is this presence of a chemical rising agent is that makes the recipe a step toward that of the scone. I halved the quantities of ingredients suggested by McNeill.

225g fine oatmeal
55g plain flour
1/4 teaspoon salt
1 teaspoon bicarbonate of soda
1/4 pint of buttermilk (in the recipe this measurement was given in teacupfuls, but this volume seemed to give a good consistency to the mixture)

1. Preheat your girdle. It is hot enough to cook on when flour sprinkled on it takes a few seconds to brown.
2. Put the oatmeal, flour and salt into a large bowl and mix well.
3. Put the buttermilk into a small bowl, add the teaspoon of bicarbonate of soda and mix briskly. McNeill writes that it will fizz up, but mine didn't.
4. Add the buttermilk mixture to the dry ingredients and bring together into a soft dough. Be careful not to overwork the mixture. The key thing is to work quickly as the bicarbonate of soda will be kicked into action by the buttermilk.
5. Roll mixture out on a lightly floured surface, to a depth of about 1/2 inch. Cut into a round (cut around a suitable size plate).
6. Dust girdle with a small amount of flour and put on the round of dough to cook. Turn the bannock over when the underside starts to brown.


I wasn't sure what to expect from the appearance of my bannock. It only swelled the smallest of amounts during cooking. I wasn't sure whether it should rise more or not, bannocks were originally unleavened breads after all; but I did think that the point of using the bicarbonate of soda was to get a rise, even if this were only very slight. Maybe I needed a bit more bicarbonate of soda; or maybe the oatmeal is too sturdy to get much rise from? (Update - I have since learnt that oatmeal has a very low gluten content so will never make a dough with 'lift'. Flat bread/scones are what you get!)

In the end I decided that my oatmeal bannock was not far removed from a giant oatcake. The oatcake recipe that McNeil gives a few pages after her instructions for bannock, comprises of oatmeal, a pinch of salt and a pinch of bicarbonate of soda, mixed with a bit of fat and hot water. The oatcakes are rolled out thinly and then cooked on the girdle. The bannock is moister and softer than these oatcakes would be, but is closer in substance to them than the savoury scone I had imagined it would appear to resemble. It was very dense and a little chewy. I avoided drinking too much water after sampling in case my stomach swelled like a haggis.


Flavour-wise the bannock was fairly bland. I do like oats, so for me this wasn't a problem, but I did find that a slice was best consumed with a lick of butter and a drizzle of honey (making up for the lack of fat and sugar in the recipe perhaps). It would be a good base to a fried feast of bacon, mushrooms, eggs, tomatoes etc., as the sturdiness and blandness of the bannock would soak up the oil and the flavours. This bannock is definitely a food for sending Scots soldiers on long marches, or to give a hill farmer sturdy legs during long days on the mountains; it would be wasted on pillows of golden cream and sweet summer fruits. Perhaps before moving out to the West Country I need to try one more of McNeil's girdle recipes, to see if I can find one that forms a closer link between the scones of Scotland and the scones of the South-West of England?

By coincidence, today (9th June) is St. Columba's Day (patron saint of shepherds). In rural Scotland this was traditionally marked by the baking of an oatmeal, barleymeal or rye bannock - one of the few foodstuffs that Columba allowed himself in his monastry on the island of Iona. The bannock would contain a coin and was shared between the children of the household. Whoever had the slice of bannock with the coin 'won' the job of looking after the new lambs for the next year (a prize coveted by children, for it meant that they were being granted great responsibility - better than an iPod, eh kids?).

Monday, May 29, 2006

Scotch Pancakes


Scotch pancakes are one of many Scottish cakes cooked on a flat bakestone or girdle (griddle to the English). The Scottish poet Robert Burns described his native land as a 'Land o' Cakes'. He may have meant the oatcake in particular, but 'cake' also meant more generally any form of bread (leavened or unleavened), or cereal-based baked foodstuff. A pancake was a 'cake' cooked on a heated flat-surface; historically a bakestone, hearthstone or girdle, and eventually a pan. Scotch pancakes are also known as 'drop' or 'dropped scones', because soft dollops of mixture are dropped onto the cooking surface. According to Laura Mason, the Scottish are the originators of the scone (a subset of the cake genus), and the 'Scotch pancake' is one of its many forms. I look forward to exploring other members of the Scottish scone family shortly...

The method of cooking on a heated surface is a very ancient one. If you only have a wood or peat fuelled fire for your cooking, it is a simple matter to bury a stone in the embers, or to prop a metal pan over the flames in order to heat the cooking surface. The Welsh have similar girdle-cooked foods of long heritage - such as crempogs (ffroes) and Welsh cakes (The Oxford Companion to Food mentions a theory that the Scottish miners who travelled south to work in the Welsh coal districts of Glamorganshire, were responsible for bringing the girdle pancake recipe with them.). Northern England shared the oatcake with the Scottish Highlands, as both areas were well suited to the cultivation of oats, although different regions prepared the oatcakes in slightly different way.

The 'girdle' used by the Scots for their cooking, is a round, cast-iron flat plate, with a semi-circular handle. The town of Culross in Fife, was granted a royal charter for their manufacture back in 1599 - this gave Culross a monopoly on the production of girdles for many years. The National Trust for Scotland has been working to preserve the town of Culross since the 1930s, so by the 20th century the success of Culross girdles had diminished somewhat. I have not been to the town, but it looks a handsome place.

Scotch Pancakes (recipe from this book)

120g self-raising flour
small pinch salt
30g caster sugar
1 egg
1/4 pint milk

1. First grease your girdle (I love that instruction) - use a oil as butter will burn, and then put on the hob to heat.
2. Sift the flour into a bowl and add the pinch of salt, and then tip in the sugar.
3. Crack the egg into the milk (best not to try doing this into the bottle), and whisk.
4. Pour the egg and milk liquid into the dry ingredients, and mix to form a smooth batter.
5. Test that the girdle is hot enough by putting a teaspoonsworth of batter onto it. You should have a fairy-size pancake cooked for you in less than a minute.
6. For the main-event pancakes, use a tablespoon to drop the batter onto the girdle. I used the back of the spoon to form the dollops into more aesthetic rounds.
7. Keep a beady eye on the batter. When the surface has become covered in bubbles get ready to flip them over using a palette knife (please ignore the scratchy metal one I am using).


Don't worry if the underside isn't as coloured as you would like it to be, you can always turn the pancake over for an extra girdling.


8. When cooked remove the pancakes from the girdle, and wrap in clean tea towel to keep moist.

The jury is out on whether to eat these hot from the girdle, or leave them to cool. Either way I think that they should be eaten on the day of cooking. This recipe makes about 18 pancakes, so a good quantity for Sunday night tea for two. Consume with butter, or butter and jam.

Sunday, May 14, 2006

Sticky Toffee Pudding Icecream with Brandy Snaps


I love icecream. I love trying new flavours. One the highlights of our trip last year to Japan was the opportunity to try matcha (green tea), sweet potato, black sesame seed, and sake icecreams. The first icecream of summer is an event of great ceremonial celebration; and if it occurs on an unseasonably glorious day in March, then so much the better. And, isn’t just amazing how at the end of a large meal, a scoop or two of icecream still manages to slither down the hatch…

Inspired by a fabulous idea dreamt up by Rob at Hungry in Hogtown for entry in the recent St. George’s day English pudding event, I just had to make a batch of sticky toffee pudding icecream to try for myself.

Sticky toffee pudding, as Rob discovered, is not a English pudding of great antiquity, but it is a dessert that is well known across the country, and one that features on the menus of eateries from homely hostelries to hoity-toity hotels. I think it deserves the accolade of 'modern classic', and is undoubtably a recipe that will have great longevity. It has an association with the Lake District, as the recipe apparently originated from the kitchens of The Sharrow Bay Hotel, that stands on the shores of Lake Ullswater, Penrith, Cumbria. The hotel was established in 1948 by the late Francis Coulson and Brian Sack. Francis was by all accounts a bit of a genius in the kitchen. He devised the recipe (originally called 'icky-sticky toffee sponge) back in the early 1970s. He was never precious about the recipe, and passed it on to whoever asked for it. However, there does appear to be a rival claim for the pudding from another Cumbrian hotel; the chef of which set up Cartmel Village Shop, in the small town of Cartmel to produce and sell the puddings commercially. If you live in the UK, then you will probably have seen Cartmel Sticky Toffee Puddings in your local supermarket. They are very good indeed.


On a cruise around Waitrose I discovered that Cartmel Village Shop also produce a Sticky Toffee Sauce. Made with only sugar, cream, butter and vanilla essence, it tastes as naughty as you might expect. Keep it out of sight, to try and keep it out of mind.

For the purposes of this recipe I bought two Marks and Spencer Sticky Toffee Puddings, as it would have been too distressing to mulch up a Cartmel pudding, and too much effort to make my own simply to use as an icecream base. The M&S puddings come in packs of two individual servings, and the quantity was pretty spot on for Rob's recipe.


A couple of notes on the making of the icecream - I took the instruction to caramelise the pudding to mean simply heating the broken pudding in its own sugary sauce. I did this over a pretty low heat for about 5-8 minutes. I added the sugar with the milk and cream (think Rob forgot to mention this). The resulting icecream had a intense flavour, but I think (for my tastes) could have benefited from a reduction in the amount of molasses used. The treacley taste was a little overwhelming. However, that aside this was a luxuriant creamy take on an already top-tip pudding.

To set off the smoothly dense icecream I decided make some brandy snaps. Brandy snaps are a form of thin, crunchy, sticky and slightly chewy ginger biscuit, made and consumed across the country. Historically they have come in differing forms, but now they are generally rolled into a tube shape when still warm. The cooled tube can then be filled with cream to serve.

Laura Mason and Dorothy Hartley both classify brandy snaps as wafers - which are thin biscuits made in a wafering iron, with heat applied to top and bottom surfaces of the biscuit. (Click here to see some historical wafers). Mason suggests that wafers (as sweet biscuits) developed from the plain wafers produced in Catholic countries for use celebrating the Eucharist. Now, it seems to me that there is quite a long journey to be made from Communion wafer to brandy snap, so I'll take Ms. Mason's word for this. Alan Davidson in the 'Oxford Companion to Food' describes the biscuits as, 'crisp, lacy baked items which stand on the frontier between biscuits, wafers and sugar confectionery.'


To me this sounds a better summation of what brandy snaps are; I can find no recipe that requires wafer tongs to cook them, instead they are oven baked on a metal sheet. I think that they could be successfully made on a flat griddle, which is perhaps closer to the cooking method used for wafers.

Brandy snaps were sold in Britain as another form of fairing (gingered biscuits were a big winner at country fairs it seems), and they came in many shapes and could be made with sugar, honey or treacle, and from the 1880s - golden syrup. Not all recipes include brandy - it seems that the flavour is not really discernable, so to make cheaper batches of snaps it was left out. Some recipes skip out the ginger too, relying solely on the cooked sugar and butter for flavouring. Don't worry, there will be none of that abstinence in this household. The recipe I followed from Jane Grigson's 'English Food' uses both brandy and ginger, and golden syrup lends its deliciously sticky presence to form the basis of the snap.

Brandy Snaps
(quantities given here make 20-30 biscuits - I used half quantities)

125g butter
125g golden syrup
125g granulated sugar
Pinch salt
125g plain flour
2 teaspoons of ground ginger
1 teaspoon of lemon juice
2 teaspoons of brandy

1. Preheat oven to 200C/400F/Gas 6. Prepare a couple of baking sheets with greaseproof paper.
2. Melt the butter, syrup and sugar in a pan over a low heat. Keep stirring, and once the sugar has dissolved take pan off the heat. Leave the mixture to cool.
3. As soon as the mixture is tepid, add the salt, flour, ginger, lemon and brandy. Mix well.
4. Measure out the mixture using teaspoons. You will need to space the dollops out well, so aim for 6 per baking sheet (you can always do a second batch - I did).
5. Jane suggests baking for 8-10 minutes, but I found this too long and the snaps burnt. By my third go I snatched the baking sheet from the oven immediately as a nice deep golden had been achieved.
6. You can shape the snaps round wooden spoon handles, or a rolling pin, and drape them over the base of a glass to form a basket. Be ready to start shaping not long after the biscuits come out of the oven. They might appear too soft, but as soon as you start to work them the mixture seems to magically harden. Hours of fun.


The brandy snaps went well with the sticky toffee icecream, but I had another batch of icecream in the freezer, also freshly churned this weekend -rhubarb ripple icecream (from an old recipe from Sainsbury's Magazine). I felt a bit mean excluding it from the chance of a moment of glory, so I popped a couple of scoops into the only brandy snap basket that I had managed to make, and stuck in a fan of broken snap.


Who needs crockery? I think that there could be a large market for edible tableware...