Sunday, October 30, 2005

Madeira Cake (with a glass of Madeira)


A slice of wine and a glass of cake. No, that's not quite right. A slice of cake and a glass of wine. What's not to like about that combination? You can tell I am already excited at the prospect, and I am not sure which I am looking forward to most. I bought a bottle of Malmsey (sweet Madeira wine) a couple of weeks ago, following a visit to Vinopolis, the wine museum near to the delights of Borough Market, London. I love Madeira, as well as sweet dessert wine (Tokaji - mmmm), and a good glass of Port. The best of them are rich with sugared fruit and spice flavours, and are like drinking a distillation of the most delicious Christmas cakes and mince pies that you have ever tasted. Malmsey is really an after-dinner drink - apparently Verdelho Madeira (medium-dry) is really the one to drink with cake - but I am sure that on this occasion it will do nicely.


So the purchase of a bottle of Blandy's Alvada 5 Year Old Rich Madeira was the inspiration for this posting. Madeira cake is not exported from the island of Madeira along with the drink, but is a butter and egg rich sponge cake, flavoured with lemon zest, supposed to be very well suited to eating alongside a glass of the aforementioned. Madeira cakes of this type date from the nineteenth century, and are eaten throughout Britain. Madeira wine has been imported into the country from at least the 1600s (legend has it that the Duke of Clarence - brother to Richard III - was drowned in a vat of Malmsey at the Tower of London in 1478).

The combination of wine with cake was first partaken of by genteel persons (mainly ladies) during the eighteenth century. The upper classes rose from their beds well after day break and had their first meal of the day (breakfast) fairly late in the morning or perhaps even after noon. Dinner (the main meal of the day) was taken early to mid-evening, and then a light supper might be enjoyed before bed-time. This meant that there was potentially quite a spell between breakfast and dinner, long enough to make me feel light-headed at the very thought of it. In order to keep the wealthy and delicate from keeling over, an additional light meal was eaten by some (and I'm sure that you could have counted me in on it). This new meal was called luncheon or lunch. The working classes had eaten a meal to serve a similar purpose from the Middle Ages onwards, but their snack was along the line of bread with ale. Georgian ladies would have instead eaten dainty cakes or sandwiches, and drunk either wine or tea. Moving into the nineteenth century lunch became established as a meal with its own time slot at mid-day, and the food eaten was more substantial, although the evening dinner was still the main meal of the day. The cake and wine/tea combination became a snack offered to and shared with visitors, whether they called mid-morning or mid-afternoon. A great incentive to visit your relatives or neighbours!

My recipe for Madeira cake came from Jane Grigson's English Food:

175g butter
175g caster sugar
275g flour (plain)
1/2 teaspoon baking powder
4 large eggs
Grated rind of half a lemon
2 strips of lemon or citron peel (used for decoration)

1. Preheat oven to 180C/350F/gas mark 4.
2. Grease and line a cake tin (20cm/8inch).
3. Cream the butter and sugar together until mixture is light and fluffy, and your arm is heavy and weak.
4. Sift the flour and the baking powder in a bowl.
5. Beat the eggs into the butter and sugar, adding each separately with a little flour to stop the mixture splitting.
6. Stir in the rest of the flour and the grated lemon rind.
7. Put the mixture into the prepared tin, and bake for between 1 1/2 hours and 2 hours. After 1 hour place the two pieces of lemon or citron peel on top of the cake, and continue baking.

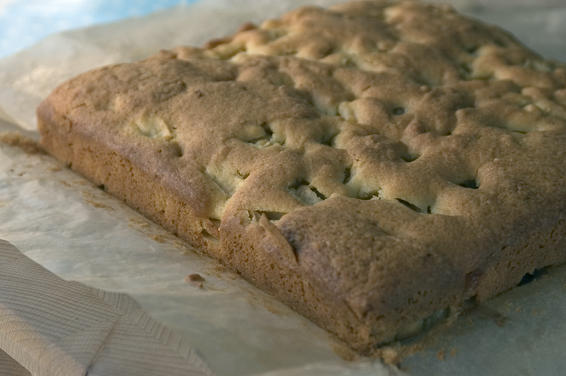
NB. I found that my cake was ready not long after an hour had passed, and it ended up a little too browned. Keep an eye on the performance of your own oven. The surface of my cake was cracked, and the application of decorative peel simply looked as if I was trying to distract the eye from the error, so I removed it.


According to the Good Housekeeping Cookery Book, if a cake has a peaked, cracked top it is a sign that either the oven was too hot; the cake was too high up in the oven; or the mixture may have been too dry or the tin too small. My suspicions lie with the oven as I have noticed my cakes tend to brown before they have finished cooking. Next time I make a cake I shall try the lowest shelf rather than the middle one.

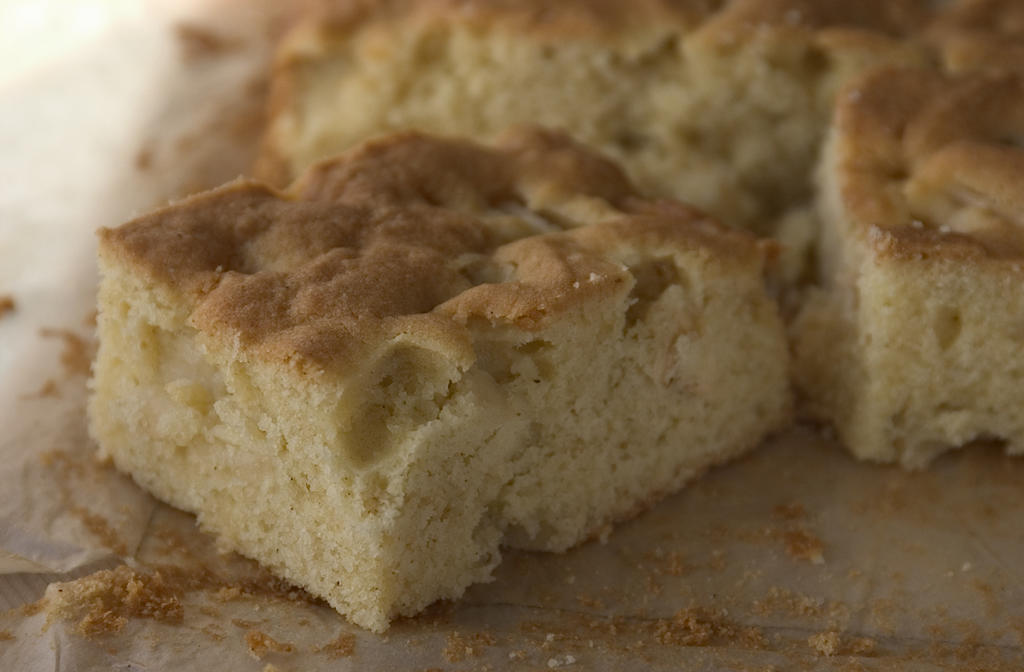
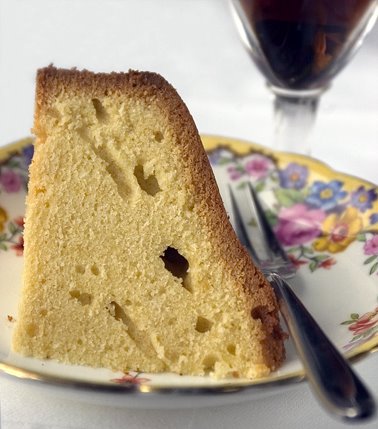
Unfortunately after removing the cake from the tin, I discovered that the surface browning also extended to the sides and underneath of the cake. The Good Housekeeping Cookery Book had a recipe for Madeira cake which baked at the same temperature as Jane Grigson's, but the recipe recommended a baking time of 1 hour, rather than up to 2. I think my cake ended up on the overcooked side. For the photo I did trim a little off the base of the cake, and I suppose it doesn't look TOO bad. The sponge was a bit dry, and rather dull. The slice was best eaten from the inside out, and the 'crust' left at the side of the plate. The glass of Madeira was sorely needed to boost proceedings. If the cake were to be moister, and there was more of a hint of the lemon zest to the flavouring, then I think this cake could be quite nice. I can see how it provides a foil to the in-your-face sweetness of the Madeira wine. In the meantime I will pour myself another glass and have a think about what I can do with the rest of the cake...
Sunday, October 23, 2005

Banbury Cakes from Oxfordshire


Banbury, Oxfordshire, may be a familiar place name to those who know the children's verse:

'Ride a cock-horse to Banbury Cross,
To see a fine lady upon a white horse,
With rings on her fingers and bells on her toes,
She shall have music wherever she goes.'

The town still retains its landmark cross, although the Puritans pulled down the original. The cross today stands in the middle of a traffic roundabout, and was erected in 1859 to commemorate the wedding of the then Princess Royal to Prince Frederick of Prussia.

Banbury cakes although not mentioned in the well-known verse, have become just as much of a symbol of the town. They have been made there from at least the early seventeenth century. At one time they were exported to places as far afield as India, Australia and America. A modern local newspaper makes use of the name as its title.

The cake shop in Banbury most closely associated with the cakes for many years was known as The Original Cake Shop, at 12 Parsons Street. The building dated back to the seventeenth century, and this served as a cake shop until it unfortunately fell into disrepair and was demolished in 1968. Also well known was Betts' Cake Shop at 85 High Street, run by a great grand-son of Betty White who set up The Original Cake Shop. See also the second postcard on this page.

There are many recipes for the cakes. The earliest one I could find via the internet is that from Gervase Markham's 'The English Hus-Wife' of 1615:

'To make a very good Banbury Cake, take four pounds of Currants and wash and pick them very clean, and dry them in a cloth; then take three Eggs, and put away one yolk, and beat them, and strain them with Barm, putting thereto Cloves, Mace, Cinamon and Nutmegges, then take a pint of Cream, and as much mornings milk, and set it on the fire till the cold be taken away; then take Flower, and put in good store of cold butter and sugar; then put in your eggs, barm, and meal, and work them all together an hour or more, then save a part of the paste, and the rest break in pieces, and work in your Currants; which done, mould your Cake of whatever quantity you please, and then with that paste which hath not any Currants, cover it thin, both underneath, and aloft. And so bake it according to bigness.'

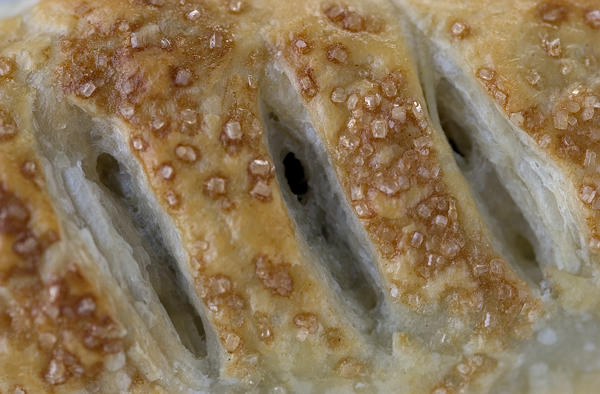
This recipe would make something closer to an enriched sponge or bread, with a piece of dough containing currants sandwiched between two currant-free pieces of dough. The modern version of the recipe uses puff pastry, and the filling is a mixture of currants, peel and spices. The recipe used today in Banbury town is a secret, but is said to also include rum and brandy. The cakes have a distinctive shape, a pointed oval shape marked with three cuts.


I have to confess that I started off by following what claimed to be the recipe from Gervase Markham's 1615 instructional book (having at that point not seen a transcript of the original), but when I started weighing out the ingredients and I was a bit concerned by the small amount of currants for a 500g weight of pastry, that I went back to the computer to do a hasty bit of extra research. The recipe I had started following is here. If you click on the link you will also see a small illustration of the cakes, which are alongside a specially shaped basket used for transporting the cakes.

So having discovered that the 1615 recipe was not made with puff-pastry (perhaps I should have guessed that?), but having bought said pastry and already rolled it out, I decided to press on with the adapted recipe. I too had to tweak the recipe to work with a slightly smaller quantity of pastry. I used a proportionally larger amount of dried fruit because I didn't want the cakes to all pastry and no filling.

My recipe went like this:

375g puff-pastry
35g melted butter
160g of mixed dried fruit and peel (super handy bag from Julian Graves)
1/2 teaspoon ground allspice
1/2 teaspoon ground nutmeg
1/4 teaspoon ground cinnamon
30g caster sugar (and some demerara for sprinkling)
1 dessert spoon of rum (shamefully I had to use Bacardi)
1 egg white

1. Pre-heat the oven 220C/425F/Gas 7.
2. Dig out a baking sheet and either grease or cover with a non-stick liner (what a great invention).
3. Roll out the pastry thinly (mine was pre-rolled - how lazy is that. In my defense the pre-rolled stuff was on buy-one-get-one-free at Waitrose).
4. Cut into circles. My recipe suggested 18cm/7 inch circles (i.e. draw around a saucer), but that would have used all my pastry up with three cakes. I found a small bowl in the drawer and drew round that. Even so I only managed eight circles.
5. Mix together the butter, dried fruit, spices and sugar, and put a small amount of this into the middle of each circle. Don't get too carried away else the filling will be too big for the cake.
6. Bring up the sides of the circle so that it looks as if you are creating a mini Cornish pasty. Crimp the edges together firmly, and then turn the cake over so the seam side is down. Press down on your cake to flatten it slightly. Put onto baking sheet.
7. When all your cakes are assembled brush with the egg white and sprinkle with the demerara sugar. Cut three slashes into the top of each cake.


8. Bake in the oven for 15 minutes.

The resulting cakes were a pleasing golden colour, and the pastry was very light (I can't take the credit for that unfortunately, but I shopped wisely!). The filling of spiced fruits made me think ahead to Christmas and mince pies hot from the oven, and I felt that I had got the proportion of filling to pastry just right. Some of my cakes had open bellies where my pastry crimping had come loose, which meant the fruit all fell out mid-way to my mouth. If I were to make them again I would keep an eye on this, or eat faster.

Saturday, October 15, 2005

Dorset Apple Cake


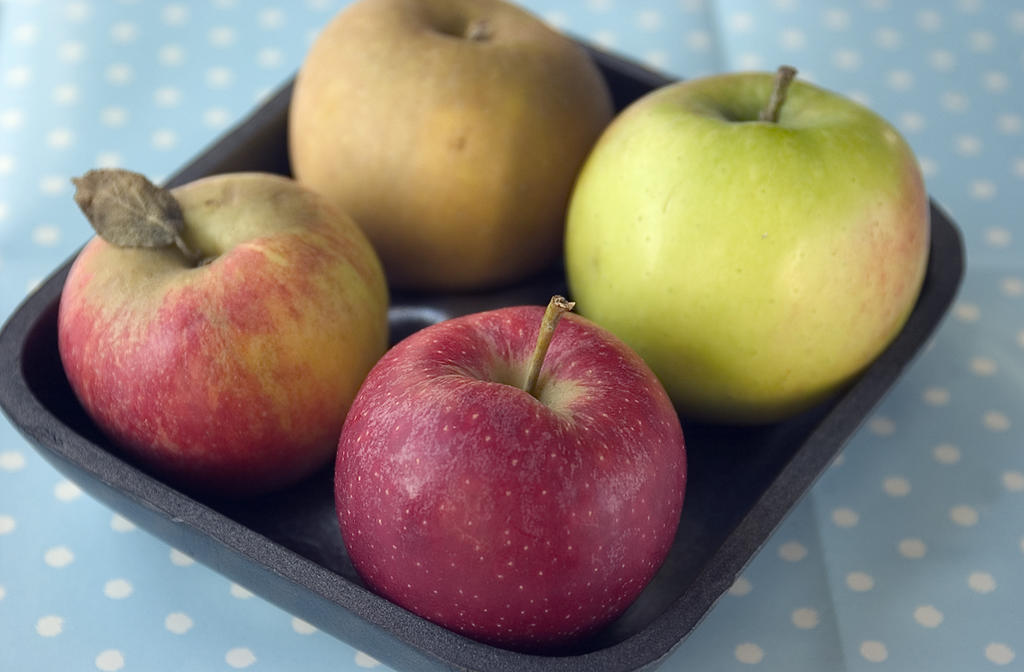
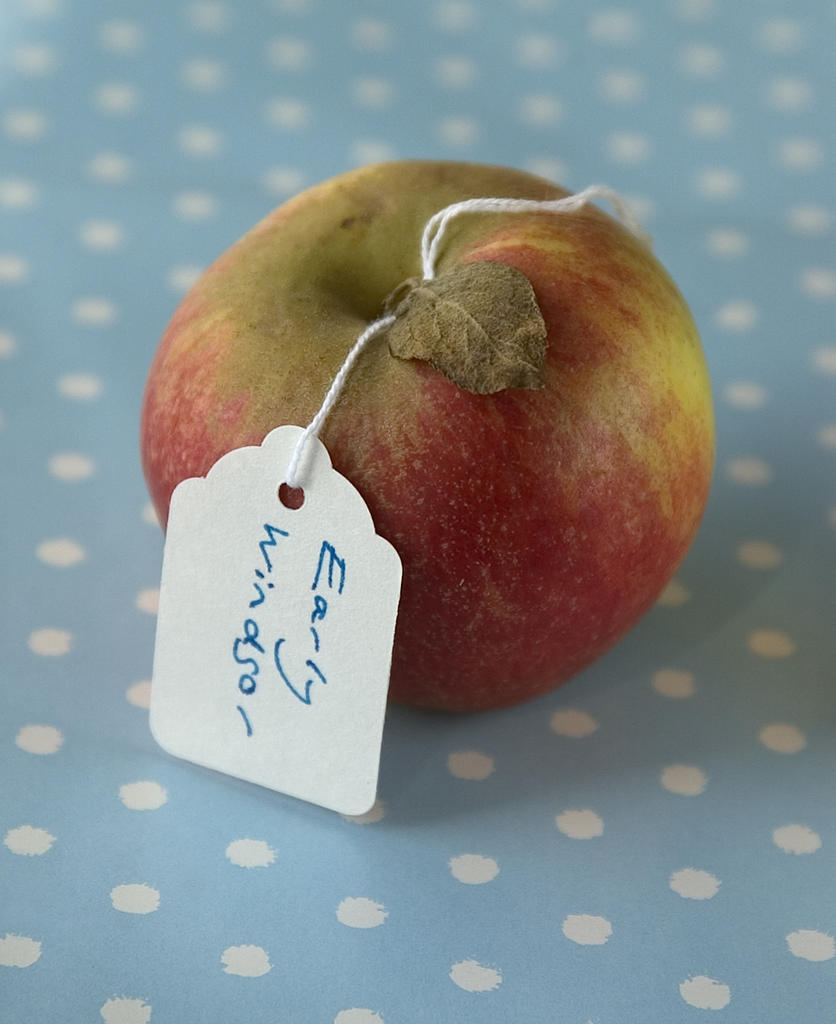
It is apple season in Britain now, and for that reason I thought I should look out an apple recipe to test. It is also a good incentive to search out the more unusual varieties of native apple. Unusual in the sense of hard to find, thanks to the way that supermarkets operate (although consumers should recognise their own responsibility to demand a broader range of varieties). I did a quick lunch-time apple shopping test at Marks & Spencer and Waitrose - both of whom claim to support British producers. Marks & Spencer disappointingly could only offer Royal Gala, Cox and Bramley apples grown in England (pretty standard fare that are easy to obtain from all large shops). They had other varieties too, but these came from France and Australia. Waitrose however scored much better. In addition to Royal Gala, Cox, Bramley, they had Spartan, Egremont Russet, Early Windsor, Regal Prince and Meridian apples. All were grown in Kent, so have come a short distance up the road to be sold in London. Of the varieties sold in Waitrose, and grown in Kent, not all are native to Britain - for example, the Regal Prince was first discovered in Angers, France.

Clockwise from left: Early Windsor, Egremont Russet, Meridian, Regal Prince:


In Dorset, the areas around the towns of Bridport and Beaminster have a soil which particularly suits apple growing. Cider is made from some of the apples grown in the county, and in the past was used as a necessary supplement to farm labourers' wages.

Each year in October is held an Apple Day, to celebrate the season for best enjoying home-grown fruit. By complete coincidence (no, I am pretty sure that they haven't held it now to coincide with my Blog posting) in Dorset this year's celebration is being held today (15th October) in Symondsbury. 2005 has been designated Heritage Orchard year. For more information on events during October to celebrate English apples, click here.

There are many recipes for Dorset Apple Cake, as it seems to be one of those recipes which people find their own way with. As I have never tasted anyone's interpretation of the recipe, I have gone with the advice of a long-time Dorset resident, Marion Watson, who writes on The Great British Kitchen website that, 'most traditional recipes are based on the rubbed-in method mixed with milk to give a rather scone-like mixture.' My recipe comes from a page on Dorsetshire.com, and it follows the method just described (I am not sure if the rabbit custard recipe on the same web page would be a good accompaniment to the cake - I think probably not).

225g plain flour
1-2 teaspoons of baking powder
1 teaspoon of ground nutmeg
pinch salt
110g butter, cut into small pieces
110g caster sugar
225g of peeled and diced apples (I used two smallish Early Windsor dessert/eating apples)
1 egg, beaten with 2 tablespoons of milk

1. Preheat oven to 180C/350F/Gas 4
2. Grease and line a square cake tin (I used a 20cm by 20cm square cake tin)
3. Sift the flour, baking powder and spice into a bowl, add the pinch of salt
4. Rub the butter into the flour mixture,
5. Stir in the sugar and the diced apples. Then add the egg and milk. Mix in to form a firm dough.
6. Fill the cake tin - the mixture will be quite shallow in the tin.
7. Bake for up to an hour - my cake was ready in 45 minutes,
8. Leave to cool in the tin.


Whilst my cake was baking I put to the test another bit of information that I had gained on English apples. The Egremont Russets which I had bought from Waitrose are part of a group known as russets because of their distinctive matt/rough golden skins. Russets have a nutty tannic flavouring which once made them popular as an after-dinner accompaniment to port. Well, frankly I didn't need to be told that twice before I poured myself a large one, and cut up an apple to eat alongside. Fantastic! If you like port, then try it for yourself.


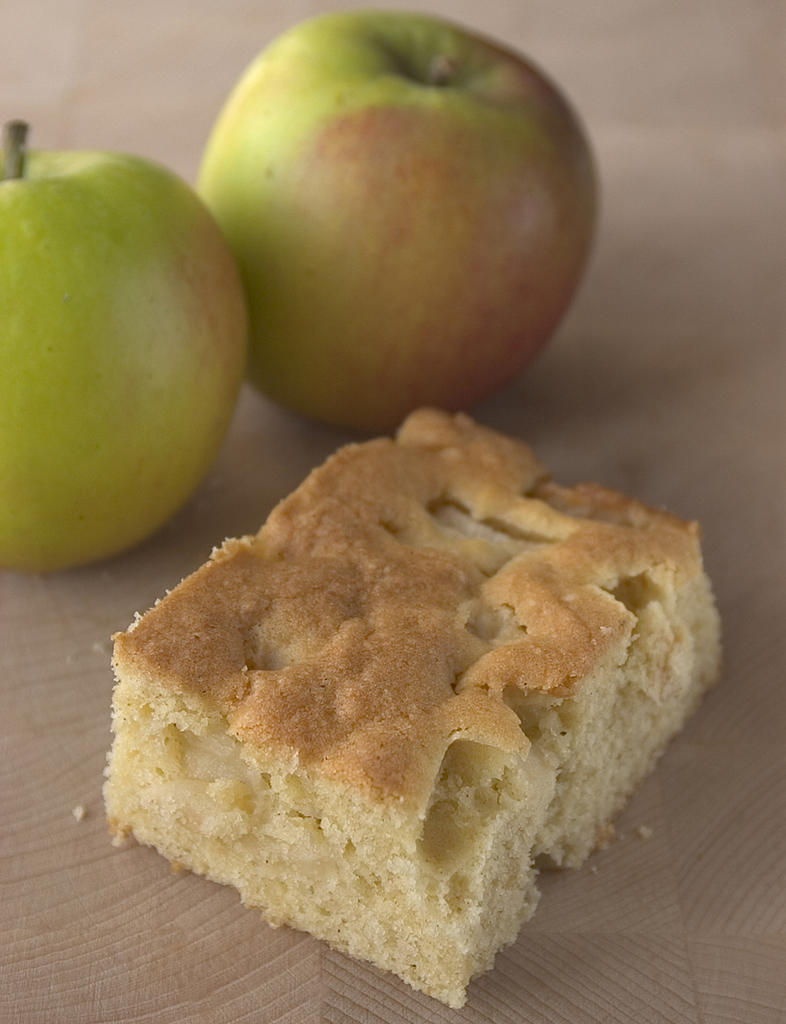
The cake didn't rise very much, which was fine, but it would be interesting to see the difference that using self-raising flour would make. The sponge was fairly dense and reminiscent of scone consistency. My taster and I agreed that the cake was a little too subtly flavoured, and that it could easily have had another one, if not two, apples added to the sponge base. The nutmeg spicing was a little indistinct, although this could be more a matter of personal taste. I also felt that this could be served warm with thick cream or (non-rabbit) custard. YUM!

Remember what an apple a day does...
(...and I'm sure that a glass of port can't be bad either)

Saturday, October 08, 2005

Bara Brith - a Welsh fruit cake


Welsh language for beginners:

Bara means bread, and brith means speckled. So, Bara Brith means speckled bread. 'Os gwelwch yn dda' is 'if you please'. With your new linguistic abilities you can go into any bakery in Wales and order this national classic. The name Bara Brith was originally used in north Wales only. In the south, the name Teisen Dorth was used (teisen means cake, and dorth/torth is loaf). Bara Brith is eaten throughout Wales and is readily available from tea-rooms, cake-shops and food markets. I lived in south Wales for a few years, so have sampled one or two in my time!

Although Bara Brith is referred to as a cake, it is, as its name suggests, a bread. In the days before baking powder and other chemical raising agents most 'cakes' were in fact fruited breads. In this instance the bread is 'speckled' with currants, sultanas and dried peel.

My recipe comes from a book called 'Welsh Country Cooking', by Chris Grant. This book record recipes handed down from the author's great-grandmother to grandmother to mother. I was a bit put off by the idea of including lard, but for authenticity used this instead of butter. When I weighed it out I realised that most cakes I make use a much greater weight of butter, so 20g of lard is not such a big deal. Maybe it's just the word I don't like - lard - say it aloud and clearly it is a substance that is heavy, joyless and cholesterol inducing.


Makes one large loaf (900g/2 lb tin):

275g strong white (bread making) flour
1 level teaspoon salt
20g lard
25g sugar (I used golden caster)
1/2 teaspoon of mixed spice (I didn't have a jar of mixed spice, so used allspice)
1 large beaten egg
1/4 pint/150ml warm water
20g fresh yeast (I used a 7g packet of dried yeast)
225g currants
125g sultanas
25g mixed peel

1. Grease your loaf tin.
2. Sieve flour and salt into large mixing bowl, add the dried yeast if using. Rub in the lard with your fingertips. Make a well in the centre.
3. Mix the sugar and spice together and put into the well.
4. Add the beaten egg to the warm water. If you are using fresh yeast use 3 tablespoons of this mixture to mix the yeast to a thin paste, before adding the remainder of the liquid.
5. Pour the egg and water (and yeast) mixture over the sugar in the well. Mix the dry ingredient in with the liquid, then knead to form a smooth, elastic dough.
6. Mix your fruit in with the dough. (I had soaked my fruit overnight in tea to plump it up, and although I had drained it well mixing in wet fruit was a bit of a messy challenge. I had to use extra flour to lessen the stickiness of the dough.)
7. Put your dough into the loaf tin (or you can make a free-form loaf on a baking sheet), cover and leave to rise for 1 1/2 hours.
8. Preheat oven to 180C/350F/Gas mark 4.
9. Bake for 30/35 minutes, covering top with a foil hat after about 20 minutes. Loaf is done when underside sounds hollow when tapped (I just guess, as I have problems turning a piping hot loaf out of a tin).


This cake/bread gave off spicy and delicious smells whilst baking, and whilst cooling on a baking rack scented the rest of my flat with the same hunger inducing scents. Please only bake this after eating.

Fortunately my guess that the loaf had cooked fully was correct, and after waiting an age for it to cool it was ready for photography and sampling.


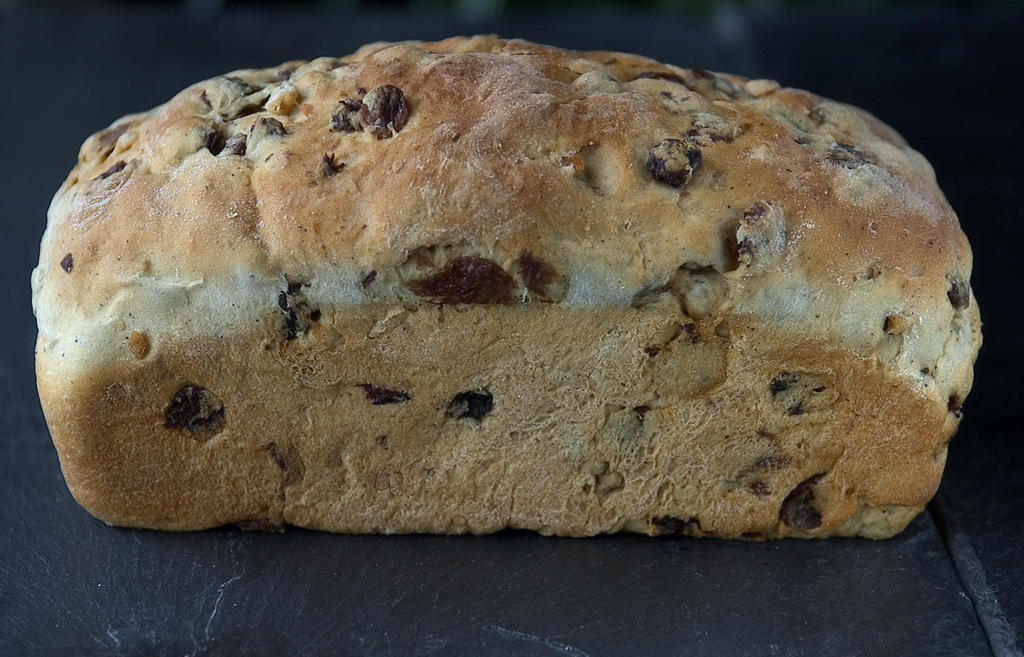
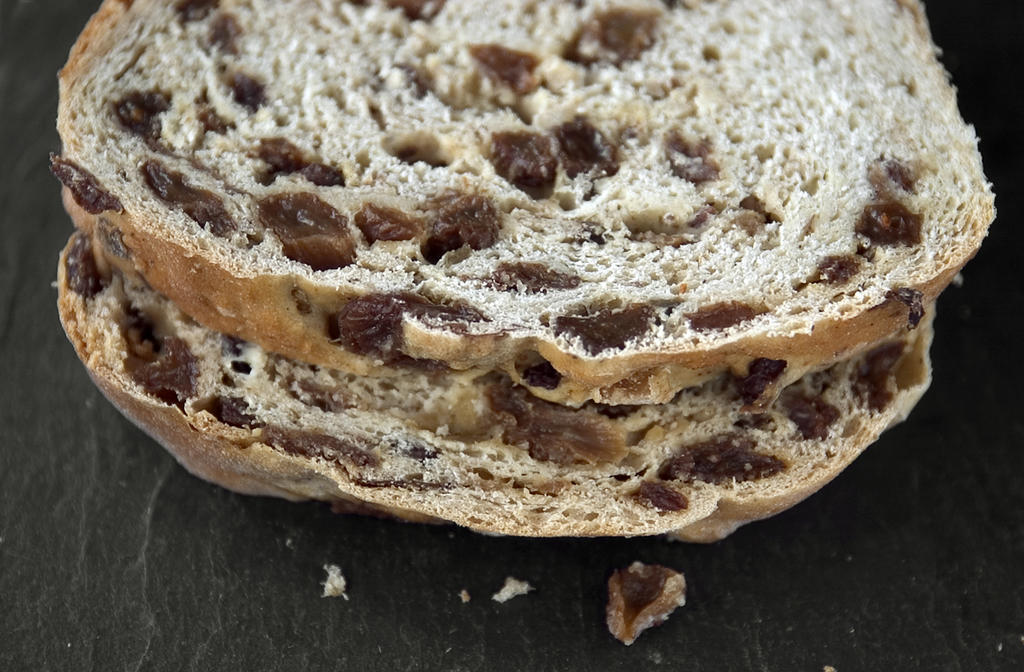
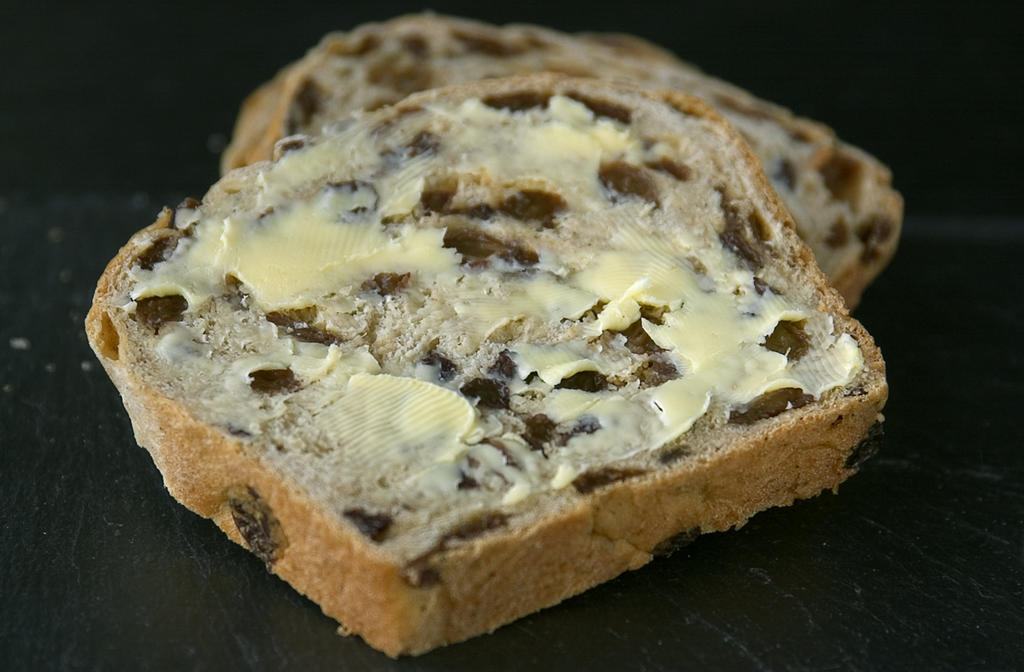
The loaf had a good weight, and felt moist rather than dry like a unfruited loaf. The slices cut neatly without the loaf crumbling away, demonstrating a good firmness. The crust on the top of the loaf was thin (rather than crusty) due to the fact that I covered the top up part of the way through the baking time. I have made fruit breads in the past and not shielded the top, ending up with a scorched crust with embedded charred currants - not so good. The Bara Brith was delicious, and didn't really need the addition of butter, however the butter currently in my fridge is Welsh so it seemed to make sense use it.

Blasus!

Monday, September 26, 2005

IMBB # 19 - Vegan Fudge Cake


A divergence from my traditional British baking; but not too far astray... With thanks to Becks and Posh for hosting the event.

First rule of cooking vegan is to concentrate. I got home from work, turned the oven on in readiness for my cake, and then went to the fridge to get the eggs out to bring them to room temperature. EGGS. Eggs have clearly no place in vegan cakes, and if one slips in then the game is over. Fortunately whilst sieving the flour (innocuous) I looked over at the carton and realised my mistake. Daft thing is that the main reason I wanted to take part in this IMBB event was to see how a cake turns out without eggs. I've made dairy-free cakes in the past, but never omitted all animal ingredients. To me a cake should be stuffed full of lovely ingredients such as eggs, milk, butter - all nice natural products and if bought from the right sources not too unfriendly to animals (I hope). This is a test to see how good a cake can be if it doesn't include any of these 'key' ingredients, and to see if it passes muster with my tasting panel.

My recipe comes from Oxfam's website, and is to promote their Fair Trade merchandise - Vegan Fudge Cake.

Having regained my concentration, I was a bit perturbed when reading through the recipe method to see soya flour included in the list of dry ingredients to first put together. No mention of soya flour on the ingredient list. Don't PANIC. Blimey, looks like a lot of water to add to the dry ingredients; are you sure that this isn't going to be a chocolate soup? A quick consultation of a few recipe books later, and I decide that the proportions of self-raising flour to sugar to fat look OK. Decide to add the water half at a time, and if all goes soupy add a little more flour. Proceed with caution (easy on the vinegar - I think this reacts somehow with the baking powder - could be wrong). Phew, looks fine.

Into the tin and into the oven. I baked for 25 mins as the recipe suggests, and then a further 10 minutes with a tin foil 'hat' on (the cake, silly), to prevent charring. Cake was pretty damp still after 25 minutes, but had a good looking crust to the top.


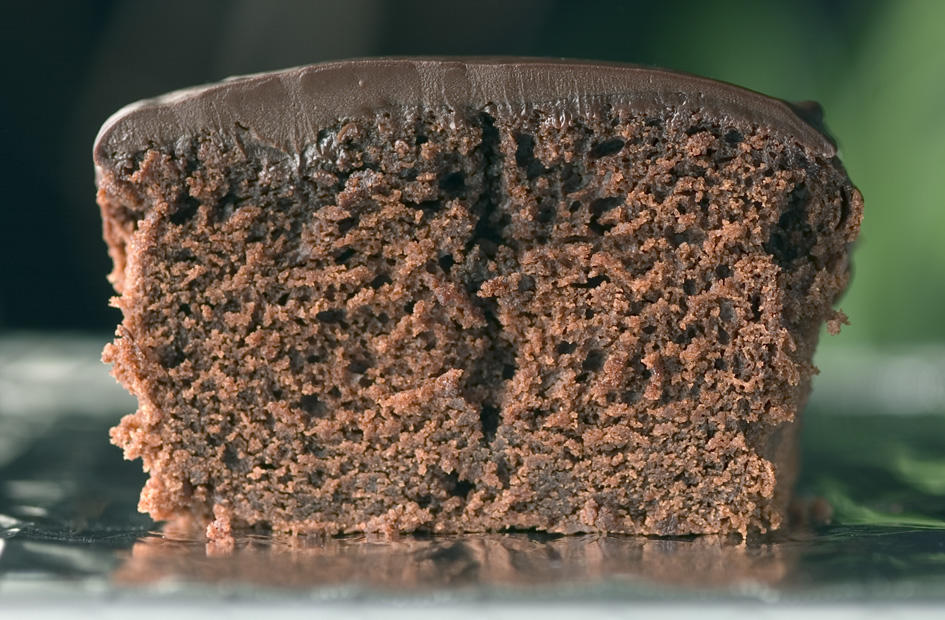
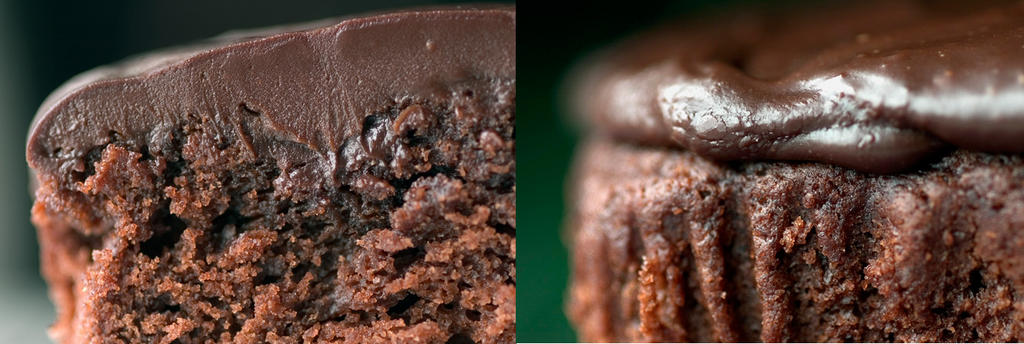
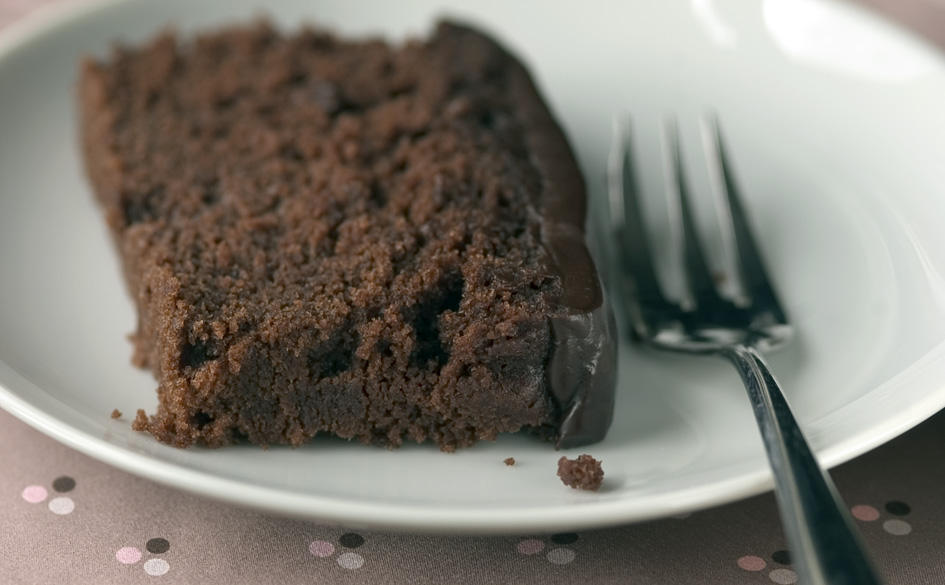
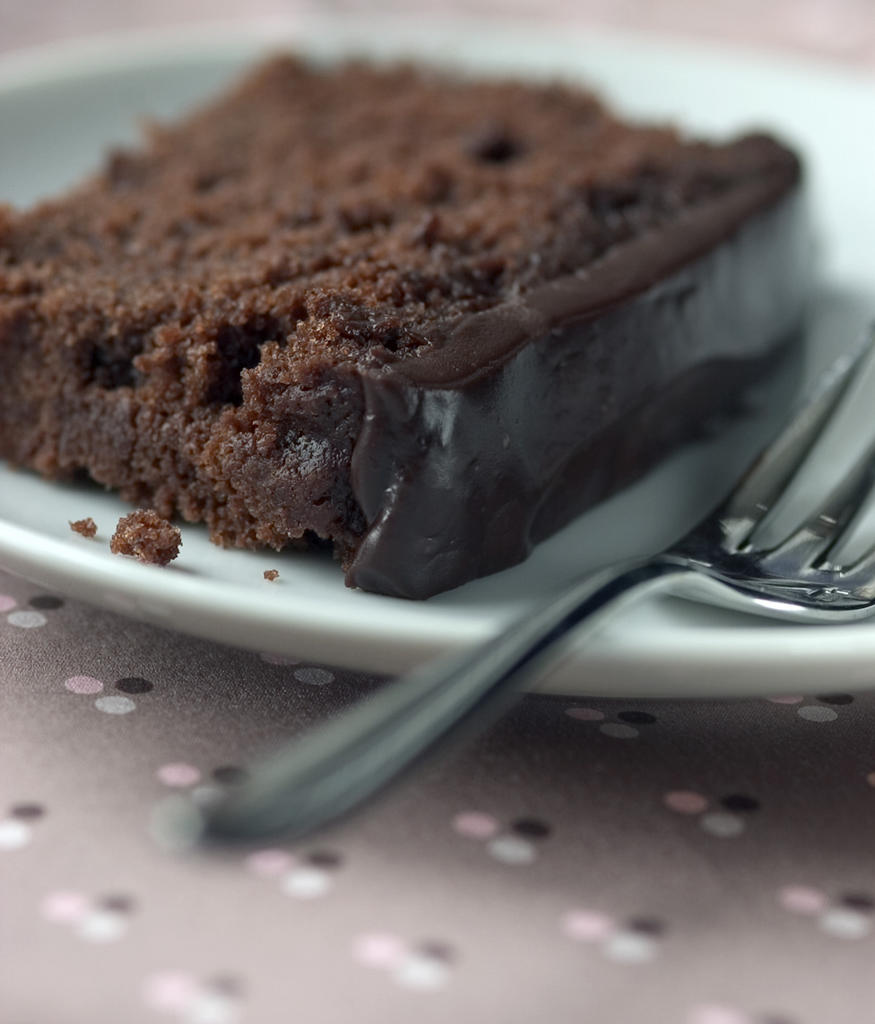
The fudge topping was a doddle to mix up, but as I had made a loaf cake I only used half the quantity of ingredients compared to the recipe. You need to keep whisking the icing until it thickens sufficiently to apply to the top of the cake. The (soya)margarine content means that the fudge icing keeps a nice gloss even when it has cooled completely.


So what did my tasters think? As the dish was pretty obviously a chocolate cake, I asked the tasters if they could determine what was missing from the cake. They were a little bit suspicious, but to be fair I am not sure that you could have spotted the lack of milk, butter of eggs from the appearance or the taste of the cake. The sponge rose nice and high, and the consistency was light and fluffy, with a good moistness. I thought the sponge was a little lacking in favour and would have been more tasty with a bit more cocoa powder added (or melted chocolate). However as the fudgy icing was so rich, the lack of strong flavour in the cake was not really too much of a problem. All in all I was pretty impressed by my animal-free baking. Eating vegan is obviously a piece of cake...


I some post-baking research about the combination of baking powder and vinegar. Baking POWDER needs a liquid to make it active, where as baking SODA need an acid such as vinegar to get it going. Although baking powder does contain a small amount of baking soda (sodium bicarbonate), the water in the Vegan Fudge Cake recipe should have done the job of activation, so I am not convinced that the vinegar was really necessary. At least it didn't impart a fish'n'chip tang to the cake. Stephanie Jaworski explains the job of baking powder and soda so clearly on her Joy of Baking website, that it is best to read it for yourself if you are interested in learning more. Also, check out Bobby Thompson's site for more imaginative ideas for demonstrating the reaction between baking powder and water. I shall be buying a baking powder submarine directly.


+

Sunday, September 25, 2005

Goosnargh Cakes from Lancashire


Goosnargh cakes originated in the village of Goosnargh in Lancashire - one of those English placenames which you just have to say out loud for the pleasure of saying it. Goosnargh cakes are in fact type of shortbread or shortcake, so are actually a form of biscuit.

I have always been a bit puzzled about what the difference was between a shortbread and a shortcake so I did a swift bit of research:

The 'short' in shortcake or shortbread, refers to the use of 'shortening' (butter or lard) in the mixture, which gives a soft, crumbling texture to the end product, but with a certain 'snap' - think how a finger of shortbread can be broken up so satfisfyingly into smaller lengths to pop in the mouth. Historically shortcake and shortbread were one and the same - a form of sweetened pastry (flour, sugar, butter, water) rolled out, cut into shapes, and baked as biscuits. Shortcake has nowadays also come to mean a dessert which comprises of stacked shortcake/bread biscuits, strawberries and cream.

Shortbread/cake tends to be associated with Scotland, but different forms of the biscuit have been made elsewhere in Britain, and regional varieties have their own distinctions. What makes Goosnargh cakes different is that they are flavoured with ground coriander and caraway seeds (according to 'The Oxford Companion to Food', although the recipes I found used one or the other flavouring, not both). I love the flavour of caraway seeds, and have a large bag of them in my cupboard crying out to be baked.

My recipe was based on one from the Green Chronicle website, which has quite a few recipes for regional British dishes. The Green Chronicle aims "to celebrate and encourage the excellence and diversity which still exists in British food production today." However, the recipe the site gives for Goosnargh cakes does not include caraway seeds, and I only loosely followed the method that they gave.

Here is the recipe I baked to:
(made about 20 biscuits)

225g unsalted butter
125g golden caster sugar (plus more for putting over biscuits)
350g plain flour
1/2 tsp ground coriander seeds
1 1/2 tsp caraway seeds

1. Preheat oven to 180C/350F/Gas 4. Grease two baking sheets.
2. Cream together butter and sugar until light and fluffy.
3. Sift flour over the creamed mix, add the coriander and caraway seeds, mix with wooden spoon until mixture resembles breadcrumbs.
4. Using your hand work mixture together to form smooth paste. Take out of bowl and onto floured surface and knead gently so that dough is smooth and ready to roll out.
5. Roll out to about 1/4" thickness, and using a circular cutter (mine was a 2" one), cut out circular discs of dough.
6. Place the discs onto the baking sheets, and sprinkle with caster sugar.
7. Put the baking sheets into your fridge (having cleared all your chilled wine off one shelf to make room). Leave for 30 minutes/1 hour until well chilled.
8. Pop into oven and bake for 15-20 minutes until just turned golden brown. Keep an eye on them as the minute you leave the room they overcook.
9. Remove from oven and sprinkle with more caster sugar. Leave to cool slightly then transfer to a wire rack.


Yes, they do build up a thick layer of sugar on the top. Some of it fuses with the hot biscuit, but if you haven't got a really sweet tooth, I suggest you knock a bit off the biscuit before eating.


The finished biscuits had that shortbread snap to them, giving a crisp, crumbly finish. The caraway flavour was clear, but the coriander was lost - perhaps the caraway was too dominant and the coriander unnecessary. So why would either of these two flavours added to a biscuit baked in the North of England. I'm afraid I couldn't find the answer. Both spices were popular for many British baking goods, so the Goosnargh Cakes were following a wider fashion.

The only additional snippet of information I could find about these cakes, was that traditionally they were eaten at Whitsuntide, as part of the associated festivities. Whitsun, or Pentecost, is observed on the seventh Sunday after Easter so the date varies from year to year, but falls in May. Of the British traditions and festivals which are associated with this weekend, many involving dancing, may poles, or rolling cheeses down steep hills are still practiced.

If you are interested in tasting some genuine Goosnargh cakes, they are still produced locally and sold in the village Post Office.

Saturday, September 17, 2005

Chelsea Buns of London


Chelsea buns were created at The Chelsea Bun House, an establishment which was situated on the borders of Chelsea and Pimlico, London, and only a stone's throw (well, a hefty lob) from where I work. The Chelsea Bun House was in business for the best part of a century; eventually closing it’s doors in 1839. At the height of its success in the 18th century it was frequented by high society, including Kings George II and III, who called in for a bun en route to the nearby Ranelagh Pleasure Gardens. The Bun House was also noted for its hot-cross buns. Legend has it that on Good Friday in 1829, 240,000 hot-cross buns were sold, and crowds of over 50,000 thronged outside the shop in anticipation of delicious buns hot from the kitchen’s ovens.

Sources disagree about the exact historic location of the Bun House– either Grovesnor Row or Jew’s Row according to what you read. Neither exist now, but in today’s Pimlico there is a Bunhouse Place, which is within strolling distance of the remains of Ranelagh Pleasure Gardens. I would like to think that this might be very near to the spot where the bun shop was. What a great address to put on your letterhead!

Chelsea buns are made from enriched bread dough, filled with dried fruit, coiled into a distinctive spiral shape, and then smothered with a sticky honey glaze. Sounds good? My experience of the ones we were served at school had soggy bottoms, and were filled with what we were pretty sure were dead flies. The best thing about them was unrolling them to eat them (and to pick out all the dead insects). Jane Grigson in ‘English Food’says that Chelsea buns are, "the best of all buns, on account of their melting buttery sweetness."– so here goes!

My recipe comes from Linda Collister's 'Bread - From Ciabatta to Rye'. Linda's recipe is for 'Miniature Chelsea Buns', which appealed to me as I like petite cakes! However, I guess the size of the bun comes down to how you roll your dough out, rather than the ingredients or the method - still, the novelty worked for me.


I got up nice and early on Saturday morning to start my dough off, as the mixture needed two risings prior to baking. I put all the ingredients together, did my 10 minutes of kneading (always makes the hands nice and soft - is this a good thing?), and then put the dough into a bowl, covered it with clingfilm and sat back to watch it rise. Well, you know what they say about watched kettles. I thought perhaps I had killed the yeast with melted butter too fresh from the microwave. I then decided that it was the decidedly autumnal temperature of the kitchen, and switched the central heating on for the first time since Spring. How well I treat my bun mixture! I found the dough a snug resting place, and decided that if it needed a few hours to rise then I may as well whizz off to the real Chelsea to view the bun's origins. Hoorah for London Underground!


Bunhouse Place is a short walk from Sloane Square underground station, and is now a mix of contemporary townhouses in a Regency style, and mews housing. The road itself was obstructed by building work, so I could only really get a photo of the place-name on the sign. If previously I had been passing the road I would not have known the story behind the name, so it was nice to have gained that insight.

Back to the kitchen...

The dough had risen whilst I was out and about, although it had only just struggled to reach the size Linda suggested (doubling). I knocked it back, rolled it out, added the mixed dried fruit and dark muscovado sugar which fills the centre of the coil, and then rolled the whole up. After slicing the roll up into equal parts, I popped them into a greased roasting tin (you need something with high sides), and left them to rise for another 30 minutes.

Whilst the buns were doing their thing, I made up the honey, sugar, milk and butter syrup which goes over the top of the dough prior to baking. This smells great!

So, post-baking what do we have?


The buns all snuggled up to each other during the baking, which is the idea. The Chelsea bun should be a square shape with a circular spiral. Mine were all rather varying in size and included one large one which I assume was an Alpha Male. The buns ended up so tightly packed that I was a bit concerned about how to get them out of the tin. Linda says to take them out CAREFULLY, and divide them up when cool. I say, how do you remove a whole tray of buns in one piece?? I divided them up to get them out - no problem.


Once safely onto the cooling rack I thought that the buns looked rather nice, with the syrup gleaming in the afternoon sunlight. Couldn't wait to try one, and once they had cooled, which didn't take long, I took one (two) to eat. The dough is quite dense and rich, and could be quite heavy in a large bun, but in small one is moist and delicious. The syrup glaze turns the buns golden, as well as giving the extra sweetness that the dough needs. If I were to make them again I would add a little spice to either the dough or the dried fruit coil, as I think this would have added a nice extra touch. The buns were much nicer than those school buns I recall, and not a fly in sight. Because my buns were made small there wasn't a great deal to be made of uncoiling the buns to eat them, but I challenge you not to!


P.S. If you are a reader of Charles Dickens, check out 'Barnaby Rudge' (Chapter 42), or 'Bleak House' (Chapter 53). Both apparently contain references to the Chelsea Bun House.

Sunday, September 11, 2005

Victoria Sponge Cake


To start my baking journey I decided to kick-off with a classic cake. The Victoria sponge cake is eaten throughout the UK, and owes its name to a past monarch. After the death of Prince Albert in 1861, Queen Victoria spent time at her house on the Isle of Wight, withdrawing herself from society. In order to inspire the monarch to get back into the swing of civic duties, Queen Victoria was encouraged to host tea parties, at which the soon-to-be-known-as Victoria sponge cake was served. Victoria sponges became fashionable throughout Victorian England, and also became the measure of the home-baker.

To be able to produce a well-risen home-made sponge cake is still a domestic skill keenly prized. Think of the competitive bakers of the Women's Institute, as portrayed in the UK film "Calendar Girls', where the prize-winning sponge is shockingly revealed to have come from Marks and Spencer rather than being home-made. I admit that I had never made a Victoria sponge cake, which seemed a good enough reason to try my hand at one, and test my baking abilities.

I looked at various recipes, and decided to try Nigella Lawson's recipe from the 'Domestic Goddess' book. Her recipe includes corn flour alongside the self-raising, which she claims makes for a lighter cake. Having only ever used corn flour in sauces and soups, I was intrigued. The only variation I made to her recipe was to use two table spoons of rose water, in place of two of the four table spoons of milk. I planned to fill the cake with raspberry jam, and thought the hint of rose flavouring would be a nice complement.

Nigella's method is to stick all the ingredients into the food processor. Works for me! Creaming butter and sugar together until pale and fluffy is too much hard work by hand.

So, what of the cake. Would I get the first prize at the W.I.?

Well, I was a bit disappointed by the level of rise, but at least the sponges didn't sink once they came out of the oven. However, filled with jam and fresh raspberries (another Nigella suggestion), they stacked up nicely to produce a good proportioned cake.


I decided against putting cream as well as jam in the cake. Much as I like cream, I find it a bit much in an already (butter) rich cake. The fresh fruit gives a refreshing 'bite'.


The cake was beautifully light (down to the corn flour?), which made it easy to eat an enormous slice. I hope that Queen Victoria was as pleased with her cake!